Saturday, August 22, 2020

A Little Lace SIP Card - Stamps Ink & Paper

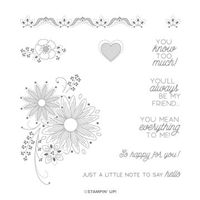
 Hello and welcome to my blog; today I am going to share with you a card that I made to send out to three of my Kinsmon Crafters Team members that just had their Anniversary being a Demonstrator.  So, I wanted to make them a little card to celebrate the occasion.  It took me a little while to figure out what set to use but I ended up using the A Little Lace Stamp Set.  I love this stamp set but haven't used it a lot so I thought it would be perfect for these Stampin' Anniversary Cards.  Here's a look at the card.  

I created this card so just using Stamps, Ink, and Paper.  This would be a great beginner crafter card and one that is easily mass produced because it is just stamps ink and paper.  I started out by cutting all the paper for the three cards.  My card base is Cinnamon Cider Cardstock cut at 5 1/2" x 8 1/2" scored at 4 1/4".  I then took a piece of Whisper White Cardstock that was cut at 3 3/4" x 5" and stamped the lace image onto it using the hinge technique and my Stamparatus using Cinnamon Cider Ink.  

I then attached it to my card base with Stampin' Seal Adhesive.  Next I stamped the floral image from the A Little Lace Stamp set onto a piece of Whisper White Cardstock cut at 3" x 4".  I used my Wink of Stella to color the large flower.  This gave a little bit of a color wash to the flower and made it stand out just a little bit more.  I love the slight watercolor effect that this gives to the cards, and it adds a little more interest.  I attached this panel to a 3 1/4" x 4 1/4" piece of Cinnamon Cider Cardstock and popped the panel up on the front of the card with Stampin' Dimensionals.  

You can see in the above picture how it adds dimension to the card.  To finish all the cards off I will add a piece of 4" x 5 1/4" Whisper White Cardstock to the inside so I can write my personal message to each of my team members that just celebrated their anniversary with the team and Stampin' Up!.  Let me go ahead and mention that if you spend anywhere close to $100 on your Stampin' Up! orders then you should join my team and start getting a discount on your orders as well as all the other benefits to being part of the Kinsmon Crafters and Stampin' Up! family.  You can read all about the benefits here.  You get $125 in products with your choice with free shipping on your starter kit for only $99.00.  It's the Ultimate Deal all the time!  

Project Recipe: 

I have created a little graphic for you to save to your Pinterest Boards in case you want to recreate this card with all the key elements listed to make it easy for you to remember what was used.  If you want to check out all my Project Recipes you can do so by clicking here.  


Thanks for dropping by today, I hope you have a wonderful day and remember that if you need any of the supplies that you have seen you can pick them up in my online store by clicking on the item or items in the shopping list below  

Happy Stampin' 
Rick Adkins 


Use the Host Code on any order of $35 (before taxes & shipping) or more by September 11th  and get invited to my September Monthly Card Class as a Thank You.  ($25 value)     If your order is $150 or more, please do not use the host code.  You will forfeit your Stampin' Rewards if you do; and I want you to get those rewards.  


If you place any size order with me during the month of August, you will receive the August Creative Stampers Tutorial Bundle from me as a little thank you.  This month's tutorial bundle has ten project tutorials that feature our favorite new Cozy Critters products from one of the new Stampin’ Up! Catalogs.  The Creative Stampers Tutorial Bundle can either be earned for FREE with any size order or Can be purchased for $22 from me.


I am very close to earning the 2021 Stampin' Up! Incentive Trip to Maui and your orders can help me get there.  I am running a few special promotions until the end of September to not only help me earn this trip but to help you save a little cash as well.   

Join me for an exclusive Online Stamp a Stack for World Card Making Day!  This is an exclusive event for my customers.  We will make 10 different cards during the event you can use whatever stamp sets you would like.  To join me it’s super simple place a $100 order before shipping and taxes in my online store using the provided host code attached to this link.  I will send you an invitation to this exclusive event.  You will not find these projects posted anywhere online.  And, at the end you will have a stack of cards to send out for World Card Making Day this year and all year long.  


I will have a new smaller promotion each week that runs from Tuesday of one week till Monday of the following week.  You will find the smaller promotions posted on my Facebook Business page each week.  So be watching for those as well.  Some promotions will only last a couple days.  Shop Now for this offer! 


With each $1000 I earn I will be cutting off a chain from my Maui or Bust Countdown Chain. 


Stampin' Up! Shopping List: 


Friday, August 21, 2020

How to Decorate the Heartwarming Hugs Coffee Cups & Coffee Carrier - Fes...

Hello and welcome to my blog; today I am going to share with you how to decorate those super cute mini coffee cups and their carrier from the August-December Stampin' Up! Mini Catalog.  These little coffee cups are super cute and make great treat packaging for that person in your life that loves coffee or other hot beverages or just someone that you want to give a super cute treat to.  Here's a look at today's project.  


Tips & Tricks: 

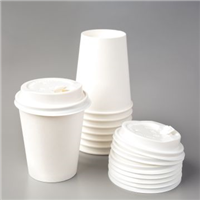
This is really not a hard thing to do but it can take a little time.  The hardest part is making sure you have everything lined up right to wrap around the mini cups.  Speaking of the Mini Coffee Cups they are actually bigger than you may think.  They are 3" or so at the widest part and about 2" or so at the bottom.  Sacrificed one of my Mini Coffee Cups to make a template for the cup wrap and added about a 1/4" to both ends to make it big enough to go all the way around the cup.  Click here to download the PDF Template for the wraps.  

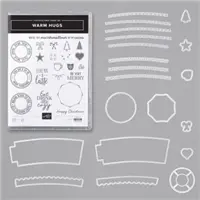
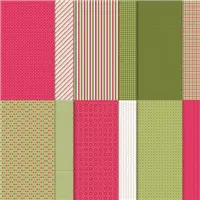
Once you get the Mini Coffee Cups wrapped (which by the way I used Seal+ to secure the Heartwarming Hugs Designer Series Paper around each) it's time to do a little stamping and decorating.  I used the Warm Hugs Bundle to decorate each of the Mini Coffee Cups and the Mini Coffee Cup Carrier.  The Warm Hugs Bundle includes the Warm Hugs Stamp Set and the Warm Wraps Dies.  The Warm Hugs Photopolymer Stamp Set adds festive accents to gift tags, cocoa and coffee sleeves, and other holiday crafts.  There are 21 photopolymer stamps in this stamp set so you will definitely find the sentiment perfect for your project.  The Warm Wraps Dies create custom holiday-themed tags and sleeves for the coordinating Mini Coffee Cups.  There are 20 dies in the die set and the  Largest die: 4-11/16" x 1-3/4" (11.9 x 4.4 cm) so they fit around the Mini Coffee Cups perfectly.  


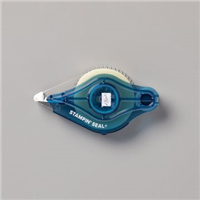
I cut the wraps from a piece of Pear Pizzazz Cardstock and used the Stampin' Seal+ to secure it in place after adding the white scalloped trim that was also cut with the matching Warm Wrap Dies.  I then used the stamp set to stamp my sentiment on a piece of Whisper White Cardstock with Mossy Meadow, Real Red, and Pear Pizzazz Inks.  I then used the matching tag die to cut then out. I cut the largest circle from a piece of Real Red Cardstock with the bigger of the Circle Dies in the set.  This die leaves a nice little stitched boarder around the edge.  I then took the smaller circle die from the dies and cut out the sentiment.  This smaller die also cuts out the center circle so I popped the cup that I stamped up with a Stampin' Dimensional.  


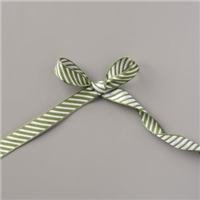
 Before attaching my sentiment to my little treat project, which by the way will hold a lot of treats, a K-Cup, a package of hot chocolate or other hot beverage packets inside, I wrapped some of the Mossy Meadow Diagonal Striped Ribbon around and tied them either in a bow or into a flat knot.  This ribbon ties so easily.  It was amazing how easy it tied:  Once you cut enough ribbon off that is.  I then added the sentiment to the front of the cup wrap with a few Stampin' Dimensionals.  

Video Tutorial: 


If you are viewing this post by email you may have to click here to view the video tutorial.  

Decorating the Coffee Carrier: 

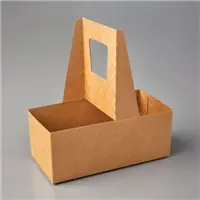
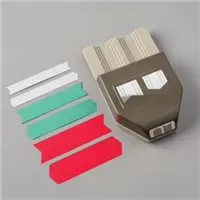
To decorate the Mini Coffee Carrier I cut two pieces of the Heartwarming Hugs Designer Series Paper to 2 5/8 x 2" and 2 pieces cut at 5 5/8" x 2" and one that's 1" x 5".  The larger pieces of designer series paper I just attached to the front of the carrier with Multipurpose Liquid Glue but you could use the Stampin' Seal or the Stampin' Seal+ if you wanted.  Then I took the 1" x 5" piece and used the Banner Pick A Punch to flag both ends.  I then attached this to the center of the front and stamped a sentiment in Real Red Ink and cut it out with the large circle die from the Warm Wrap Dies.  I attached the circle with a Stampin' Dimensional and added a flat knot made from a left over piece of the Mossy Meadow Ribbon that I attached with a Mini Glue Dot.  


After that all you have to do is pop your treats into your decorated cups and place the lids on them.  Put the decorated Mini Coffee Cups into each place on the Mini Carrier.  Each Mini Carrier will hold two Mini Coffee Cups.  

Project Recipe: 

I have created a little graphic for you to save to your Pinterest Boards to help you remember the main items that I used on today's projects in case you would like to recreate them.  You can check out all my Project Recipes here.  


Thanks for dropping by I hope that you enjoyed this little how to for the Heartwarming Hugs Mini Coffee Cups and Mini Carrier.  If you need any of these supplies you can pick them up in my online store by clicking on the item in the Shopping List below.  

Happy Stampin' 
Rick Adkins 


Use the Host Code on any order of $35 (before taxes & shipping) or more by September 11th  and get invited to my September Monthly Card Class as a Thank You.  ($25 value)     If your order is $150 or more, please do not use the host code.  You will forfeit your Stampin' Rewards if you do; and I want you to get those rewards.  


If you place any size order with me during the month of August, you will receive the August Creative Stampers Tutorial Bundle from me as a little thank you.  This month's tutorial bundle has ten project tutorials that feature our favorite new Cozy Critters products from one of the new Stampin’ Up! Catalogs.  The Creative Stampers Tutorial Bundle can either be earned for FREE with any size order or Can be purchased for $22 from me.


I am very close to earning the 2021 Stampin' Up! Incentive Trip to Maui and your orders can help me get there.  I am running a few special promotions until the end of September to not only help me earn this trip but to help you save a little cash as well.   
Join me for an exclusive Online Stamp a Stack for World Card Making Day!  This is an exclusive event for my customers.  We will make 10 different cards during the event you can use whatever stamp sets you would like.  To join me it’s super simple place a $100 order before shipping and taxes in my online store using the provided host code attached to this link.  I will send you an invitation to this exclusive event.  You will not find these projects posted anywhere online.  And, at the end you will have a stack of cards to send out for World Card Making Day this year and all year long.  


I will have a new smaller promotion each week that runs from Tuesday of one week till Monday of the following week.  You will find the smaller promotions posted on my Facebook Business page each week.  So be watching for those as well.  Some promotions will only last a couple days.  Shop Now for this offer! 


With each $1000 I earn I will be cutting off a chain from my Maui or Bust Countdown Chain. 


Stampin' Up! Shopping List: 


Template Designed by creativeworkerbee