Thursday, August 13, 2020

3 Cards from 1 Sheet of Designer Series Paper - One Sheet Wonder

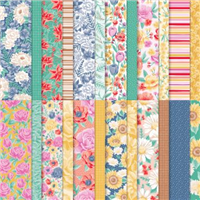
 Hello and welcome to my blog; today I am going to share with you the cards that I made during my Facebook Live yesterday afternoon.  I took one sheet of the Flowers For Everything 6 x 6 Designer Series Paper and made three cards using it.  Here's a look at the three cards I made. 


I love it when you can get multiple cards from one sheet of designer series paper.  And, I especially love it when you can get multiple cards from a 6" x 6" piece of Designer Series Paper as I did in today's video and post.  Let's look at all three cards shall we.  

Tips & Tricks: 

To get multiple cards from one sheet of 6" x 6" paper can be tricky, but it doesn't have to be.  It's all a matter of figuring out the best way to cut it.  With these cards I started out by cutting what you would if you were cutting a piece off for a card front. I cut 2" off one side so that gave me a 2" x 6" and a 4" x 6" piece of Flowers For Everything Designer Series Paper.  I started off dealing with the 2" x 6" piece of Forever Flowers Designer Series Paper.  I cut it down using my Paper Trimmer to 2" x 5 1/2" and layered that unto a piece of 2 1/4" x 5 1/2" piece of Cinnamon Cider Cardstock. I then layered that unto my card base which was made from a 4 1/4" x 11" piece of Thick Whisper White Cardstock (a half of sheet cut portrait style) and then folded in half.  


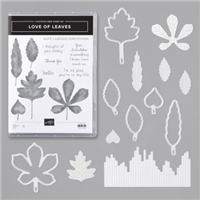
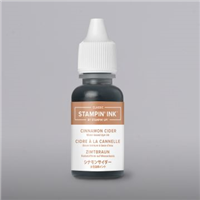
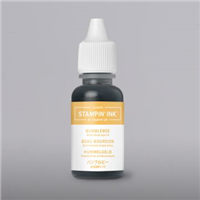
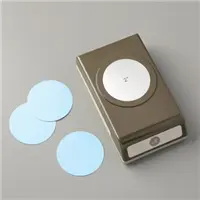
To this I added a leaf that I stamped in Cinnamon Cider Ink from the Love of Leaves Stamp Set and cut it out with the matching dies from the Love of Leaves Bundle.  My sentiment came from the same stamp set and I stamped it in Bumblebee Ink and punched it out with a 2" Circle Punch.  I attached the matted piece of Flowers for Everything Designer Series Paper and added the leaf.  I popped the sentiment up with Stampin' Dimensionals and added a double bow that was made with Linen Thread with a Mini Glue Dot.  Super simple right!  


The next two cards I made the same way but changed which side of the Flowers For Everything Designer Series Paper was facing up.  I took the reminder 4x6" piece of Designer Series Paper and cut it in half at 3" x 4".  So, just a little tip with this you do have to watch your papers directional pattern to make sure it comes out looking okay.  You want to make sure you are watching that while you are cutting.  After cutting the Flowers for Everything Designer Series Paper I matted each piece of Designer Series Paper onto a 3 1/4" x 4 1/4" piece of Cinnamon Cider Cardstock to have a nice little mat.  I then attached this to the same size Thick Whisper White card bases as above.  


I also repeated the stamping and the way that I did it as above with stamping two more leaves from the Love of Leaves Stamp Set in Cinnamon Cider Ink and my sentiment in Bumblebee Ink.  I used the same 2" Circle Punch for the sentiments and the Stitched Leaves Dies to cut out the leaves and add the inside stitching to each.  I also added a double bow made from Linen Thread.  I attached everything the same way as I did in the card at the top.  I have another idea to do with one of these cards to create a different look that I will share with you tomorrow in case you want to make three completely different cards.  This came to me this morning so I will make it this afternoon and share it in tomorrow's post.  

Video Tutorial: 


If you are viewing this post by email you may have to click here to view the replay of my Facebook Live video.  Not all email servers show the embedded codes.  

Project Recipe: 

I have created a little graphic for you to pin to one of your Pinterest boards to remember what the main items I used if you want to recreate these cards.  If you want to check out all my project recipes you can do so by clicking here.   

Sizes & Dimensions: 

Here's a list of what you need cardstock wise to recreate these cards.  
  • 3 Thick Whisper White Card Bases cut at 4 1/4" x 11" scored at 5 1/2" 
  • 2 Cinnamon Cider layers cut at 3 1/4" x 4 1/4" 
  • 1 Cinnamon Cider layer cut at 2 1/4" x 5 1/2" 
  • Scrap Whisper White for the 2" Circles and Leaves
  • 1 piece of 6" x 6" Designer Series Paper cut at 2" x 5 1/2" and two cut at 3" x 4" 
Thanks for dropping by today I hope that you have a wonderful day.  If you need any of the supplies that you have seen today you can pick them up in my online store in the Shopping List below.  All you have to do is click on the item and you will be taken to my shopping page.  

Happy Stampin' 
Rick Adkins 


Use the Host Code on any order of $35 (before taxes & shipping) or more by August 14th  and receive  my August Monthly Card Class Kit & Invitation to my Zoom Live Class featuring the Ridiculously Awesome Stamp Set as a Thank You.  ($25 value)  In the Kit you will receive the supplies to make four different card designs.   If your order is $150 or more, please do not use the host code.  You will forfeit your Stampin' Rewards if you do; and I want you to get those rewards.  Monthly Card Class Kits will be mailed to you by August 22nd.  


If you place any size order with me during the month of August, you will receive the August Creative Stampers Tutorial Bundle from me as a little thank you.  This month's tutorial bundle has ten project tutorials that feature our favorite new Cozy Critters products from one of the new Stampin’ Up! Catalogs.  The Creative Stampers Tutorial Bundle can either be earned for FREE with any size order or Can be purchased for $22 from me.


I am very close to earning the 2021 Stampin' Up! Incentive Trip to Maui and your orders can help me get there.  I am running a few special promotions until the end of September to not only help me earn this trip but to help you save a little cash as well.  I am kicking off my Maui of Bust Promotions with a Mega Holiday Embellishment Product Share.  The deadline to take part in the Mega Holiday Embellishment Product Share is August 21, 2020.  You can check out what's all included in this Mega Holiday Embellishment Product Share by clicking here.  I will have a new smaller promotion each week that runs from Tuesday of one week till Monday of the following week.  So be watching for those as well.  Some promotions will only last a couple days.  


With each $1000 I earn I will be cutting off a chain from my Maui or Bust Countdown Chain.  I got to cut the first one off yesterday during my Live Video.  


Stampin' Up! Shopping List: 


Wednesday, August 12, 2020

August - December Mini Ribbon & Embellishment Shares Now Open


Rick’s Holiday Ribbon & Embellishment Shares

 This is my First Maui or Bust Promotion!  To kick things off I thought it would be a great way to share the love with a little product share.  


Get a share of all the ribbons and embellishments from the August-December Mini Catalog at a budget friendly price.  Product shares are a great way to try out items to decide if you want to get a full pack of the items. 


Included in the Shares:


·         1 yard of each of the following ribbons

o   Mossy Meadow 3/8” Diagonal Stripe Ribbon

o   of Real Red 3/16” Braided Linen Trim

o   Real Red 3/8” Sheer Ribbon

o   All the Trimming Ribbon Combo Pack

§  1/8” Old Olive Gold Trim Ribbon

§  1/8” Poppy Parade Gold Trim Ribbon

o   Wonder of the Season Ribbon Combo Pack

§  1/16” Gold Cord

§  1” Shaded Spruce Satin Ribbon

o   Snowflake Splendor ¼” Ribbon

o   Basket Weave & Metallic Ribbon Combo Pack

§  ½” Mint Macaron Basket Weave Ribbon

§  1/8” Copper Grosgrain Ribbon

o   1 ½” Metallic Mesh Ribbon

o   3/8” Embroidered Ribbon

·         You will also get a share of the following embellishments

o   Glitter Star Ornaments

o   Beaded Pearls

o   All the Trimming Embellishments

o   Snowflake Adhesive-backed Sequins

o   Wonderful Gems

o   Blue Adhesive-backed Gems

o   Acorn Trinkets

o   Iridescent Pearls

·         Plus, a sample of the following:

o   3- 6” x 6” pieces of the Plush Poinsettia Specialty Paper

o   1 – 6” x 6” pieces of Red Foil

o   1 – 6” x 6” piece of Green Foil

o   ½ a pack of the Wonder of the Season Memories & More Card Pack

o   4 – Wonder of the Seasons Memories & More Cards & Envelopes

o   1 – 6” x 6” piece of Balmy Blue Glimmer Paper

o   1 – 6” x 6” piece of the Brushed Metallic Cardstock in the following colors Copper, Bronze, & Gold

o   2 – Gold Cards & Envelopes

o   1 – 6” x 6” piece of Black Glitter Paper

o   1 – 6” x 6” piece of Red Velvet Paper


You will receive all this for only $78.66 which includes all shipping and taxes. That is over half of what it would cost if you purchased everything listed above in the catalog.  Deadline to order is August 21st

 Email Me to Register 

Share Schedule:

Share Closes – August 21st

Orders placed – August 22nd

Orders Received by – August 26th

Rick will cut and repackage everything – August 27th – August 29th

Mail out on or before August 31st

All shares are based on availability and backorders.  If there are any backorder issues those shares will ship separately once I get them and cut and get them ready to send out to you. 


Happy Birthday - Gift Wrapped Bundle

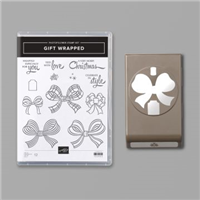
 Hello and welcome to my blog; today I am going to share with you a super simple little card using the Gift Wrapped Bundle from the August - December Mini Catalog.  This is typically a Christmas Stamp Set but you can stretch it by using a greeting stamp set for so many other occasions.  This was one of the items on my Top 10 List that I shared last week.  If you missed that post you can check it out here.  Here is a look at the birthday card I made using this set.  

Tips & Tricks: 

As I mentioned above the Gift Wrapped bundle is not necessarily just for Christmas!  You can change the colors of the bows and add an additional greeting set to it and make projects for any and all occasions which is why I think it's a must have in your crafting stash.  There are so many different uses for bows and not just for Christmas presents.  You need bows all year round.  So I took this bundle and made a birthday card with it.  To start off I picked some very untraditional colors that you wouldn't think of for a Christmas set.  I used Daffodil Delight, Flirty Flamingo, and Whisper White on my card today.  You could also use this same set and color combination to make a card for a baby shower for a little girl.  

After picking the color combination I started the building process.  I stamped one of the bow images from the stamp set in Memento Tuxedo Black Ink onto a piece of Whisper White Cardstock.  I used my Flirty Flamingo Stampin' Blends to color it.  I then used the matching Gift Bow Builder Punch to punch it out.  


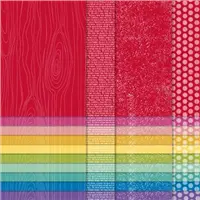
Next, I took a piece of Daffodil Delight Cardstock and cut it to 4 1/4 x 11" and folded it in half to make my card base.  To that I added a 1" x 5 1/2" strip of Flirty Flamingo Designer Series Paper from the Brights 6 x 6 Designer Series Paper and attached it to the card base.  I cut another piece of the same paper to 3" x 4" and layered that to a 3 1/4" x 4 1/4" piece of Whisper White which I popped up on the card base with Stampin' Dimensionals.  I wanted this to be representative of a birthday present.  


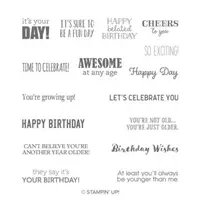
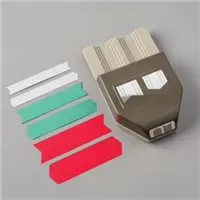
After that was all in place on the card base I took a 1/2" strip of Whisper White cardstock and one of the sentiments from the Itty Bitty Birthday Stamp Set and stamped it in Daffodil Delight Ink.  I used both the Lovely Label Pick a Punch and the Banner Pick a Punch to add a little bit of interest to the both ends and to make it look like a tag hanging from the bow.  Before attaching the long skinny tag I placed the bow onto the card front with a Stampin' Dimensional.  Then I attached the little tag tucking one end under the bow with Mini Glue Dots to finish off my card.  

Card Recipe: 

I have created a little graphic here that you can pin to your Pinterest Board to help you remember what I used to create this page if you wanted to recreate it.  If you want to check out all my other Project Recipes you can do so on my Recipe Board by clicking here.  


Thanks for dropping by today If you need any of the supplies that you have seen today you can pick them up in my online store by clicking on the items below in the shopping list.  In case you are wondering I am getting ready to cut off my first chain from my Maui or Bust Promotion going on right now.  I also will be releasing the first promotion a little later today so be watching for that.  


Happy Stampin' 
Rick Adkins 


Use the Host Code on any order of $35 (before taxes & shipping) or more by August 14th  and receive  my August Monthly Card Class Kit & Invitation to my Zoom Live Class featuring the Ridiculously Awesome Stamp Set as a Thank You.  ($25 value)  In the Kit you will receive the supplies to make four different card designs.   If your order is $150 or more, please do not use the host code.  You will forfeit your Stampin' Rewards if you do; and I want you to get those rewards.  Monthly Card Class Kits will be mailed to you by August 22nd.  


If you place any size order with me during the month of August, you will receive the August Creative Stampers Tutorial Bundle from me as a little thank you.  This month's tutorial bundle has ten project tutorials that feature our favorite new Cozy Critters products from one of the new Stampin’ Up! Catalogs.  The Creative Stampers Tutorial Bundle can either be earned for FREE with any size order or Can be purchased for $22 from me.

Stampin' Up! Shopping List: 


Template Designed by creativeworkerbee