Hello and welcome to my blog; today I have a super cute and fun card tutorial for you featuring the Many Mates Stamp Set and the Flowers for Every Season Designer Series Paper. I am going to share with you how I made the Shirt & Tie card I shared on my blog a week or so ago. This is a great card for you to make now with Father's Day coming up soon and the best part is it's easy. The Shirt & Tie card looks way more complicated than it really is. Here's a picture of my card.
Tips & Tricks:
The shirt and tie card is really easy to do as I mentioned above. It's just a few pieces of designers series paper and cardstock, a card base, and a little stamping. For this version of the card I used a Magenta Madness card base cut at 4 1/4 x 11 scored at 5 1/2 as the base. I used a piece of Whisper White Cardstock as the shirt. The only scoring you have to do for the shirt is at 5/8" at the top of the Whisper White Cardstock. Once you have it scored you will cut in on both sides of the score line one inch. I lined the Whisper White layer back up at 5/8" and cut in from the left side to the one inch mark on the clear trimmer guard. And moved it over to the other side at four" and cut in to 3" on the clear trimmer guard.
You are going to fold the to cut pieces into the middle of the cardstock to form the collar as seen above. For the tie you will need a four by four inch piece of designer series paper. You can use any designer series paper that you would like. I picked the Flowers for Every Season Designer Series Paper for my tie because I think it has fun patterns and makes fun colorful ties. Which are something that I like. You may want to pick one of more subtle patterns. There are plenty to pick from in this pack of designer series paper. Another pack that's in the new catalog that would be fun to make ties with is the Pattern Play Designer Series Paper. To see how I folded the tie watch the video tutorial I will walk you step by step on how to do it.
Video Tutorial:
If you have problems seeing the video in this post you can click here to view it.
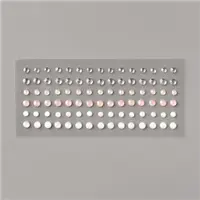
After you get your tie made and attached to the card front with Mini Glue Dots you are going to stack two Stampin' Dimensionals on top of each other and press each side of the collar into the adhesive. The double dimensionals will give enough height that the bulky top part of the tie in not in the way of the collar closing. Finish off with a couple of the 2020-2022 In Color Enamel Dots on the collar to look like buttons. Once you have the shirt and tie made it's then just a matter of attaching it the card base. I used liquid glue for that and centered it on the card base so there was a nice margin all the way around.
Thanks for dropping by today I hope that you have a wonderful day and that you give the Shirt & Tie card design a try. It really isn't as hard as you think it looks. I was quite surprised myself at just how easy it was. If you need any of the supplies I used today they can be picked up in my online store. You will find a list of everything I used in the Shopping List below.
Happy Stampin'
Rick Adkins
Use the Host Code on any order of $50 (before taxes & shipping) or more during the month and receive a gift from me in June as a Thank You. If your order is $150 or more, please do not use the host code. You will forfeit your Stampin' Rewards if you do; and I want you to get those rewards.
If you place any size order with me during the month of June, you will receive the June Creative Stampers Tutorial Bundle from me as a little thank you. This month's tutorial bundle features twelve Masculine themed projects. All the products used can be found in the new 2020-2021 Stampin' Up! Annual Catalog. The Creative Stampers Tutorial Bundle can either be earned for FREE with any size order or Can be purchased for $20 from me.
My Online BOGO sale is going on now until Thursday at 8 pm CST in my private BOGO Sale group. Shop my exclusive retired products and earn New Catalog Products for free. https://www.facebook.com/groups/ricksonlinebogosale/


