Tuesday, May 26, 2020

Under My Umbrella - The Spot Color Challenge #112

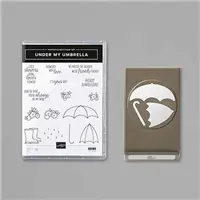
Hello and welcome to my blog; today I have a colorful card for you to go with this week's color challenge over at The Spot.  The Spot is a weekly papercrafting and card making challenge blog.  Each week there's a different theme, sketch, color, or inspirational challenge to play along with.  I picked the Under My Umbrella stamp set and matching punch to create my card with today. As a kid I remember some people had these really cool colorful umbrellas that had multiple colors.  I wanted one so bad, but heck we didn't even have an umbrella growing up.  So I created my own today.  Here's a look at my card.


Here's a look at this week's challenge image that inspired my color selection. With this week's challenge you have to use at least three of the five colors but you can use all five like I did if you want.

Tips & Tricks: 

I started out by stamping the umbrellas from the stamp set I actually went ahead and stamped both because I wasn't sure if I would use them both or just the open one.  I stamped them all on Whisper White Cardstock in Tuxedo Black ink.  I then stamped them again in each of the five colors.  I punched out all ten of them both the whisper white ones and the colored ones.  Once I had them all punched I started cutting the colored ones apart and paper piecing them into the whisper white ones.  


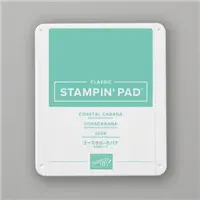
With each color grouping I switched the colors on the umbrella up.  One my have pumpkin pie, granny apple green, coastal cabana, and the others my have a different color combo.  Once I had all the paper piecing done I added a different color handle to each one.  I then took a piece of Coastal Cabana Cardstock and stamped the raindrops in Coastal Cabana ink all over this piece to create a background.  


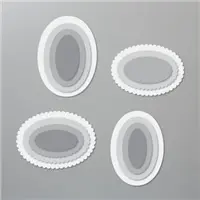
I then added each of the umbrellas to the background with liquid glue.  I then cut off any part that was hanging over the edge.  I then matted my card front onto a piece of Basic Black Cardstock cut at 4 1/8 x 5 3/8.  I stamped my sentiment in Tuxedo Black and cut it out with one of the stitched oval dies from the Stitched Shapes Dies.  I added a scalloped oval in Basic Black Cardstock behind it to make it pop a little more.  I then added it to a Thick Whisper White card base cut at 4 1/4 x 11.  


Now I have a super cute card that I can send to someone letting them know they are on my mind.  Its bright colorful and cheery which is always great for cards like this and card challenges can provide that inspiration for you as well.  There are a lot of great ones out there and I personal think that The Spot Creative Challenge is one of the bests!  Okay I may be a little bias.  

Thanks for dropping by today, if you need any of the supplies you have seen today you can pick them up in my online store in the list below.  If you have been on the fence about the Under My Umbrella stamp set I suggest you get it now you only have another week to get the stamp set and punch as a cost saving bundle.  So differently take advantage of that additional 10% savings.  

Happy Stampin' 
Rick Adkins 


Use the Host Code on any order of $50 (before taxes & shipping) or more during the month and receive a gift from me in May as a Thank You. If your order is $150 or more, please do not use the host code.  You will forfeit your Stampin' Rewards if you do; and I want you to get those rewards.


If you place any size order with me during the month of May, you will receive the May Creative Stampers Tutorial Bundle from me as a little thank you.  This month's tutorial bundle features Birthday Bonanza Suite of Products from the January-June Mini Catalog.  The Creative Stampers Tutorial Bundle can either be earned for FREE with any size order or Can be purchased for $20 from me.

Stampin' Up! Shopping List: 


Monday, May 25, 2020

2020 2021 In Color Comparison - Facebook Live Replay


Today I am going to share with you the new 2020-2022 Stampin’ Up! In Colors and we are going to take a deep dive into them.  

So, what are In Colors:  Well I am glad you asked.  In Colors are a group of colors that Stampin’ Up! Comes out with every two years.  We get five new ones when they come out.  These are colors that are not in any of the current color families, and they complement and support the core colors.  They are also colors that are very on trend at the time.  So, you can count on your projects being on trend when you use them.  

This year’s colors are Cinnamon Cider, Just Jade, Bumblebee, Magenta Madness, and Misty Moonlight.  Let's look at each color with colors from the current Stampin' Up! Color Families and see how they compare.  

Cinnamon Cider – a rich warm golden hue that reminds me of the crisp cool air of fall and the changing leaves.  This is quickly becoming one of my favorite colors.  Compared with similar colors you can see that there's no comparison color for Cinnamon Cider.  It will look great with Crushed Curry, Cherry Cobbler, Early Espresso, Petal Pink, Crumb Cake, and Cajun Craze.  

Bumblebee – Bumblebee is close in hue to its name sake.  It is a fun warmer yellow tone that will a great summer and fall color.  Compared with Crushed Curry, Daffodil Delight, So Saffron, and Mango Melody you can see that Bumblebee really doesn't look like any of them.  It's kind of close to Crushed Curry but not really.  In the video I also compare it with hello honey and Delightful Dijon two retired In Colors from past years.  Bumblebee looks great with Blackberry Bliss, Old Olive, Poppy Parade, Shaded Spruce, Merry Merlot, and Flirty Flamingo. 


Magenta Madness - Is a very bright magenta color.  If you want to liven a project up with a bold bright color this is the one for you.  Has a very 70’s color feel.  Compared with Melon Mambo, Berry Burst (retired), Flirty Flamingo, Rococo Rose.   Looks great with coastal cabana, so saffron, pool party, granny apple green, mango melody, and calypso coral

Misty Moonlight – very warm denim tone great color for any time of the year and to add to your masculine projects.  I compared it with night of navy, dapper denim(retired), pacific point, other blues
Misty Moonlight looks good with balmy blue, petal pink, night of navy, daffodil delight, crumb cake, & mossy meadow

Just Jade – fun green shade that will be a great all year long green.  Has a hint of a subtle but the brightness of a bright.  I compared Just Jade to all green shades that we currently have (pictured above is just a few), and I also pulled Emerald Envy that retired and looked at it against it.  Just Jade looks great with petal pink, gray granite, crushed curry, rich Razzleberry, shaded spruce, calypso coral

Video Tutorial: 


Thanks for dropping by today I hope you find this comparison of the new 2020-2022 In Colors helpful.  They will be here in just over a week.  Can you believe it.  

Happy Stampin' 
Rick Adkins 

Sunday, May 24, 2020

Forever Fern - Split Stamping Note Cards

Hello and welcome back to my blog; I have a project for you this time instead of a tip.  If you missed my post of refilling your ink pads you can click here to view it.  A week or so ago I saw Jennifer McGuire share a technique video on her channel and I just had to try it.  Her technique just spoke to me and it made perfect sense.  I had an Ah Ha moment, so my cards today are using her technique well kind of anyway.  She and stamped and die cut the images and did it but I just stamped my images.  I will share the ink to her blog so you can watch the video here.  Which will all make scene a little later if you do not know what I am talking about.  Anyway here is a look at the note cards I made.  

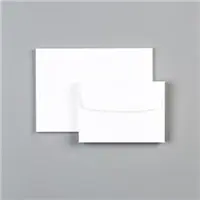
Forever Fern Stamp Set, Just Jade Cardstock, Whisper White Cardstock, Whisper White Note Cards & Envelopes, Stampin' Up!, Rick Adkins

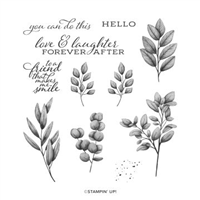
I used the Forever Fern Stamp Set that is in the New 2020-2021 Stampin’ Up! Annual Catalog that is going live next week on June 3.  I like this set because it is not flowers, but it is still foliage.  And can be used for anyone male female it does not matter.  The Forever Fern Stamp Set allows you to create cards and accents with the detailed leaves of different foliage imagery.  It has versatile sentiments perfect on any project which is also a plus.  

Forever Fern Stamp Set, Just Jade Cardstock, Whisper White Cardstock, Whisper White Note Cards & Envelopes, Stampin' Up!, Rick Adkins

Tips & Tricks: 

Before I started stamping, I took a piece of 5” x 7” piece of Whisper White Cardstock, a pencil, and a T-ruler and marked the center, which was at 3 ½” on my cardstock size.  Next, I stamped the images from the stamp set in Soft Seafoam, Pear Pizzazz, Old Olive, Garden Green, Shaded Spruce and Pretty Peacock Classic Inks onto my Whisper White Cardstock right down the center line that I created.  I let some of the images overlap just a little in each of the colors.  I could not let them overlap to much because this is a distinktive stamp and it loses its details if the images overlap too much.  

Forever Fern Stamp Set, Just Jade Cardstock, Whisper White Cardstock, Whisper White Note Cards & Envelopes, Stampin' Up!, Rick Adkins

After that I took my whisper white piece to the Paper Trimmer and lined it up at the middle point and cut it in half.  I then cut it down to the size I needed for my note cards.  But I decided I wanted to tie in the Just Jade color (by the way if you are wondering where I picked all these colors they are in the new Forever Greenery Designer Series Paper) so I cut them down just a little bit more to 3 ¼” x 4 ¾”.  

Forever Fern Stamp Set, Just Jade Cardstock, Whisper White Cardstock, Whisper White Note Cards & Envelopes, Stampin' Up!, Rick Adkins

I layered up my stamped cardstock onto a piece of Just Jade cardstock that I cut at 3 3/8” x 4 7/8”.  And then layered that onto my Whisper White Note Cards.  I then stamped my sentiment onto another piece of Just Jade Cardstock that I cut at 7/8” x 3 3/8”.  I stamped the Hello sentiment in Shaded Spruce Classic Ink in the center of this piece.  I attached it to the note card with a little Multipurpose Liquid Glue.  

Forever Fern Stamp Set, Just Jade Cardstock, Whisper White Cardstock, Whisper White Note Cards & Envelopes, Stampin' Up!, Rick Adkins

That finished off two note cards with just one piece of cardstock.  Again, I said it was an Ah Ha moment.  I am sure you are slapping your head the way I did when I first saw this done.   This technique is a great way to make a lot of cards in a smaller amount of time.  Thanks for dropping back by today, I hope you have a wonderful Memorial Day Holiday.  Remember to think about those that have passed that have served the tomorrow and say a little prayer in their honor. 

joining special r c kinsmon studio

If you need any of the supplies that you have seen today you can order them in my online store, and the new products will be available June 3.  Now if you can not wait until the catalog goes live next week you can still add the new items to the Ultimate Bundle and join my team.  You can get $125 in products for only $99 with free shipping.  It is always the best deal in any catalog!  Plus, you get all the perks of being on my team of Kinsmon Crafters along with your 20% discount and the ability to order from new catalogs before everyone else and actually get your catalog early as well.  

Three main reasons to Join!  

  1. You Get at least a 20% discount on all your orders while you are a demo.   
  2. You get to join my fun Kinsmon Crafters Team and Private Facebook Group.
  3. Access to directions to all my online classes 

Happy Stampin' 
Rick Adkins 


Use the Host Code on any order of $50 (before taxes & shipping) or more during the month and receive a gift from me in May as a Thank You. If your order is $150 or more, please do not use the host code.  You will forfeit your Stampin' Rewards if you do; and I want you to get those rewards.


If you place any size order with me during the month of May, you will receive the May Creative Stampers Tutorial Bundle from me as a little thank you.  This month's tutorial bundle features Birthday Bonanza Suite of Products from the January-June Mini Catalog.  The Creative Stampers Tutorial Bundle can either be earned for FREE with any size order or Can be purchased for $20 from me.

Stampin' Up! Shopping List: 

Tips & Tricks of Refilling Your Ink Pads

Classic Stampin' Ink, Ink Refill, Stampin' Up!, Rick Adkins

Hello and welcome to my blog; today I have a quick little tip video for you on refilling your ink pads.  This is something that we all must do to keep our ink pads working properly.  Or, you can just toss it and buy a new one, believe me I feel you, but refilling is so much cheaper.  And not as hard as you may think.  

Classic Stampin' Ink, Ink Refill, Stampin' Up!, Rick Adkins

What do I have to Have:  

All you really need is your ink pad, an ink refill, and a plastic spoon.  Once you have these basic items on hand you can quickly and easily refill your ink pads without too much of a mess; unless you are like me and get ink everywhere.  If you are, bless you I feel your pain.  But in all honesty, it is not that hard.  

Tips & Tricks: 

Now, as I mentioned above, I do not use any fancy tools to do this I just bought a box of plastic spoons from the store and I use the back of it.  And I clean it off when I am done with a baby wipe so one spoon will last you for a while.  I simply take a few drops of my chosen ink refill and put on my ink pad and move the ink around with the spoon and press it into the pad a little.  It does not take a lot of pressure you really want gravity to do the work for you.  The ink will soak into the pad.  

Classic Stampin' Ink, Ink Refill, Stampin' Up!, Rick Adkins

You can also look at the side of the pad to see if color of the foam is getting darker.  As the ink soaks into the pad you will see it soaking into the pad.  But the spoon allows you to spread the ink around the pad so that you have good coverage.  Now another little tip is you can use this same technique to move ink out of your way if you are using a distinktive stamp.  These types of stamps work better with an ink pad that is not as juicy.  In this situation to much ink is not your friend.  

Classic Stampin' Ink, Ink Refill, Stampin' Up!, Rick Adkins

Now, one thing that I like to do after refilling my ink pad is:  I like to let it sit for a little while before I use it.  A freshly inked pad can still be to inky, so you do have to watch the amount of ink refill you put on.  To me it is best to do a little let it sit and come back and add more if need be.  Ink pads can be a finicky little so and so, but if you know how to take care of them when they are low on ink it will make your life so much easier.  

Classic Stampin' Ink, Ink Refill, Stampin' Up!, Rick Adkins

Another piece of advice I have for new stampers and well any stamper is to make sure when you order your ink pad go ahead and get the ink refill as well.  That way you will have one on hand and want have to wait for one to arrive when you pad is running low on ink.  

Video Tutorial: 


I hope that you enjoy this bonus video tip this week and it helps you out.  I know there’s a lot of new stampers and crafters out there that may not know how to refill their ink pad and may just toss it and buy new or get frustrated and stop stamping because they are not getting the results they want.  Remember to get your ink refills at the same time you purchase your ink pads it saves time, money, and heartache.  

Happy Stampin' 
Rick Adkins 
Independent Stampin' Up! Demonstrator 

Template Designed by creativeworkerbee