Tuesday, May 19, 2020

Birds & Branches for The Spot Sketch Challenge #111

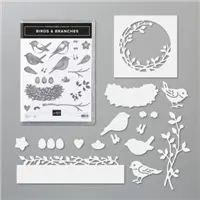
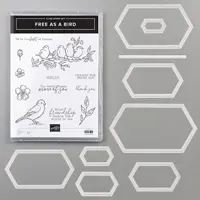
Hello and welcome to my blog; today I am going to share with you my cute card that I made for this week’s sketch challenge over at The Spot!  Since I am featuring the new 2020-2022 In Colors this week, I picked one of them to focus on today. I also picked the new Birds and Branches Bundle to showcase on my project.  I think this stamp set and die bundle is super cute and it was so easy to work with I was hugely impressed.  Here is a look at my card.  

Birds & Branches Bundle, Misty Moonlight, Bumblebee, Tasteful Textile 3d embossing folder, Rick Adkins, Stampin' Up!

I started off my card design today by picking the colors I wanted to use.  I knew I wanted to feature Misty Moonlight on my card, so I picked two coordinating colors to go along with it.  I chose Crumb Cake, and Mossy Meadow.  Both play nicely with the soft denim hue of Misty Moonlight.  I also through in Bumblebee with these three colors just for a little fun.  

Birds & Branches Bundle, Misty Moonlight, Bumblebee, Tasteful Textile 3d embossing folder, Rick Adkins, Stampin' Up!

Next, I took my 3 7/8” x 3 7/8” piece of Crumb Cake Cardstock and used the Tasteful Textile 3D Embossing Folder to add some incredibly beautiful texture to my card.  The Tasteful Textile 3D Embossing Folder lets you cozy up to your crafting projects with the added look of a warm, luxurious fabric.  The embossing folder adds a rich texture on feminine and masculine projects alike.  Embossing folders make it so easy to make a great impression and they are so easy to work with.  All you need to do is place your flat cardstock in the embossing folder, run it through a die-cutting and embossing machine, and out comes cardstock with a bold texture design.  3D embossing folders take embossing to a whole new level, with deeper, more detailed impressions than standard embossing folders.  

Birds & Branches Bundle, Misty Moonlight, Bumblebee, Tasteful Textile 3d embossing folder, Rick Adkins, Stampin' Up!

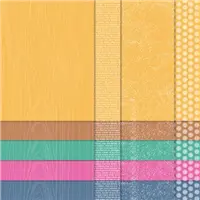
After embossing the Crumb Cake Cardstock, I added it to a Mossy Meadow layer that was cut at 4” x 4”.  I then took a piece of Misty Moonlight Cardstock and cut out the circle image with the branches and leaves.  I then used my largest scalloped circle and cut it out completely.  The branch circle die cut is the same size as the largest circle die in the Layering Circle Dies.  Before adding the circle-die cut to my card, I added two pieces of 2020-2022 In Color Designer Series Paper.  One was in Bumblebee and has the polka dot pattern.  The second is a wood grain pattern in Misty Moonlight.  Both pieces were cut at 1” x 3 7/8”.  

Birds & Branches Bundle, Misty Moonlight, Bumblebee, Tasteful Textile 3d embossing folder, Rick Adkins, Stampin' Up!

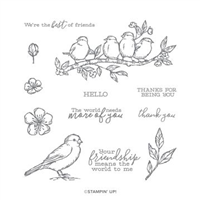
I then stamped one of the bird images from the stamp set.  This is a layering (two step) set with a watercolor look.  I started out by stamping the silhouette image in Daffodil Delight Classic Ink.  And then stamped the detailed layer in Crumb Cake Classic Ink. I added the wing in Basic Gray Classic Ink over the other stamped layers.  This creates a progressively darker color with each layer you stamp.  I then stamped the bird’s little feet before taking the matching dies to cut both images out.  I layered them together with a little liquid glue.  Before placing it on my card front. 
 
Birds & Branches Bundle, Misty Moonlight, Bumblebee, Tasteful Textile 3d embossing folder, Rick Adkins, Stampin' Up!

Next, I stamped the flower image in Daffodil Delight Classic Ink on Bumblebee Cardstock.  I stamped the other image onto Mossy Meadow cardstock in matching ink.  I then cut them both out with their matching dies.  I added the mossy meadow leaves to the circle image; and popped the flowers up on Dimensionals.  I stamped the sentiment in Crumb Cake Classic Ink on a strip of Crumb Cake Cardstock.  I added it to the card front with Multipurpose Liquid Glue.  

Birds & Branches Bundle, Misty Moonlight, Bumblebee, Tasteful Textile 3d embossing folder, Rick Adkins, Stampin' Up!

I then added the card front to a piece of Misty Moonlight Cardstock cut at 8 ½ x 4 ¼ scored at 4 ¼.  I finished off my card by adding a 4 x 4 piece of Whisper White Cardstock to the inside of the card with the nest and bird stamped on the inside.  I then added a few of the Misty Moonlight Enamel Dots to the center of each flower.  


Here is a look at the sketch that inspired my card today. Thank you for dropping by I hope that you take time this week and play along with use over at The Spot Creative Challenge.  The new products that I have showcased today will be available on June 3, 2020.  If you want to get your hands on these items early you can join my team and add them to your starter kit.  Which, by the way is the best deal in the catalog!  You will find all the items to add to your shopping list and shopping carts in the shopping list below.  
Happy Stampin' 
Rick Adkins 


Use the Host Code on any order of $50 (before taxes & shipping) or more during the month and receive a gift from me in May as a Thank You. If your order is $150 or more, please do not use the host code.  You will forfeit your Stampin' Rewards if you do; and I want you to get those rewards.


If you place any size order with me during the month of May, you will receive the May Creative Stampers Tutorial Bundle from me as a little thank you.  This month's tutorial bundle features Birthday Bonanza Suite of Products from the January-June Mini Catalog.  The Creative Stampers Tutorial Bundle can either be earned for FREE with any size order or Can be purchased for $20 from me.

Stampin' Up! Shopping List: 

Monday, May 18, 2020

Rick's Online BOGO Sale Coming Soon!


BOGO Sale
Friday, June 5, 2020 till Thursday, June 11, 2020

I am getting ready to kick off my Online BOGO Sale!  I am making plans now and have pulled all the retiring products I have for this sale.  And believe me there's a lot of dies, punches, stamps, and more that will be sold during this sale.  I will be holding the sale in a private Facebook Group that you will need to ask to join

The sale will kick off on Friday, June, 2020 at 1 PM CST with a live shopping event where I will walk you through all the items that are for sale.  The sale will go on both during and after the live event.  This year's BOGO sale will go from Friday, June 5, 2020 till Thursday, June 11, 2020.  So if you can't make the live you will still have plenty of time to shop and earn FREE items.  
I have also included a free gift with each qualifying purchase (while supplies last).

Requests to join the group will start being approved on June 1st.  

Guidelines on how it will work can be downloaded here!  I have tried to make this super easy for both you and I.  All the guidelines will be followed to the letter.  

Free As A Bird Card using Watercolor Pencils

Hello and welcome to my blog; today I am going to share with you a fun card using the Free as A Bird Stamp Set, and some tips & tricks on using Stampin’ Up!’s Watercolor Pencils.  I have been playing with watercolor pencils for a long time and had a love hate relationship with them until Stampin’ Up! ®™ came out with their own a couple years ago.  Now I am in hog heaven using them.  Here is a look at the card I made today.  

Free As A Bird Stamp Set, Watercolor Pencils, Tasteful Texture 3d embossing Folder, Rick Adkins, Stampin' Up!

The Birds in the Free as A Bird Stamp Set are so cute and are just begging to be colored with your watercolor pencils.  Do not be afraid just go for it.  Once you follow a few simple tips & tricks I have for you today you will be able to send these cute little birds to all your friends because they deserve it.  
Our Watercolor Pencils now come in two sets, of high-quality, smooth color pencils; that are perfect for watercoloring any stamped image.   One thing that will help you to achieve a great look with your pencils is the type of paper you use.  You can use Whisper White cardstock just like I did today, but you must treat it very nicely.  Meaning you cannot use an aqua painter on plain cardstock.  You can however use a Blender Pen for best results.  This is my preferred method for moistening the pigment and moving it around to fill in my line art image.  Aqua Painters or any other type of water brush holds and release way too much water for the smooth Whisper White cardstock surface.  

s A Bird Stamp Set, Watercolor Pencils, Tasteful Texture 3d embossing Folder, Rick Adkins, Stampin' Up!

Now if I do use a aqua painter or want to use more water to more the pigment around for a nice wash type background I pull out my shimmery white cardstock or watercolor paper for this.  But I did not need that today, so I just stuck with the blender pen and the plain whisper white cardstock.  
Another thing you need to consider is the type of ink you are using.  If you are using a die-based ink like I did today you must sit the cardstock aside for awhile to completely dry or heat set with a heat tool.  I choice to just sit it aside and let the ink dry and soak into the cardstock.  Stazon which is the preferred ink for watercoloring is not one of my favorite inks, so I am fine with letting the other sit and dry the card my take a little longer, but I am happy to wait.  

s A Bird Stamp Set, Watercolor Pencils, Tasteful Texture 3d embossing Folder, Rick Adkins, Stampin' Up!

My next tip and this one is the most important one is how and where you hold your pencil.  Yes, there are certain places to hold your watercolor pencil or any pencil in art to achieve the correct look.  Watercolor pencils are all about the amount of pigment you put down on the paper.  You may be wondering why I put this here.  Well it’s because the closer to the end of the pencil you are holding in your hand the more pigment you are putting down on the cardstock.  So, if you want a dark area of color come closer to the point of the pencil and color.  Which means the for lighter and mid-range color you need to come back further from the tip of the pencil.  A good rule of thumbs is to hold the watercolor pencil in the middle area of the pencil for a medium amount of pigment to be placed on the cardstock.  And for lighter areas you want to hold the pencil closest to the end of the pencil as you will see in the video.  

s A Bird Stamp Set, Watercolor Pencils, Tasteful Texture 3d embossing Folder, Rick Adkins, Stampin' Up!

Once I have the entire image colored, I will come back with my blender pen and wet the pigment and get it to move around the cardstock blending the darks mediums and lights together.  This is how I achieved the gradient look on my images today.  

Video Tutorial: 


I hope that you find these little tips and tricks helpful as you explore watercolor pencils and stamping.  If you need any of the supplies, you have seen today you can pick them up in my online store by clicking on the item in the shopping list below.  

Happy Stampin' 
Rick Adkins 


Use the Host Code on any order of $50 (before taxes & shipping) or more during the month and receive a gift from me in May as a Thank You. If your order is $150 or more, please do not use the host code.  You will forfeit your Stampin' Rewards if you do; and I want you to get those rewards.


If you place any size order with me during the month of May, you will receive the May Creative Stampers Tutorial Bundle from me as a little thank you.  This month's tutorial bundle features Birthday Bonanza Suite of Products from the January-June Mini Catalog.  The Creative Stampers Tutorial Bundle can either be earned for FREE with any size order or Can be purchased for $20 from me.

Stampin' Up! Shopping List: 


Template Designed by creativeworkerbee