Monday, October 21, 2019

Hello Floral Card-To A Wild Rose

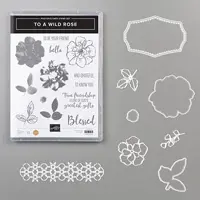
Hello and welcome to my blog; today I am going to share with you a card that I made yesterday using the To A Wild Rose Stamp Set and some of my Stampin' Blends.  To A Wild Rose is a great layering stamp set that actually is a Million Dollar Sales Achiever Set that is currently in the Stampin' Up! Annual Catalog.  I love this card that I created it just makes me happy.  Here's a look at my card.

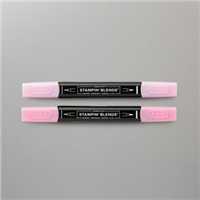
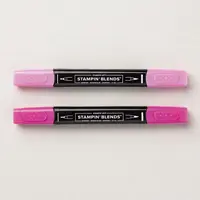
For my card today I stamped the outline of the rose from the stamp set three times using Tuxedo black ink and the leaves cluster three times and a couple other times so that I could have some extra leaves.  Once the ink dried I started the coloring process.  All the leaves where colored with Soft Suede light & dark Stampin' Blends.  I then colored the flowers next.  For the lighter pink flower I colored with my Flirty Flamingo and Lovely Lipstick combo blends.  The darkest areas were done with the Dark Lovely Lipstick and blended out until I got to the lightest area.
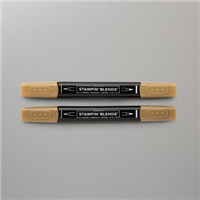
The two darkest roses were colored with just the Lovely Lipstick light and dark blends.  Once I had everything colored I colored in the centers of the roses with my dark Daffodil Delight.  I then took a white gel pen and added some little white dots to the centers.
Once all the coloring was done it was time to use the matching dies to cut out the roses and leaves.  The leaves that I stamped that was just the the single leaf I cut out with my paper snips.  I laid out my arrangement onto the card and then used press and seal to hold it into place while I worked on my card base.
I used the Decorative Mask Stencils and did a little ink blending in Flirty Flamingo ink on the area that the flowers were going to be at.  I then flicked on some Flirty Flamingo and Lovely Lipstick ink.  Once the ink had dried I added a little liquid glue behind the leaves and flowers that was facing up on the press and seal.  I then placed the cluster of flowers (still on the press and seal) onto the card base.  I then pulled the press and seal back up with the remaining flower and a couple leaves up and added a few Stampin' Dimensionals behind them.  I then placed that flower and leaf back onto the arrangement.
I stamped my sentiment in Tuxedo Black ink in the bottom third of the card base.  I then added a few sequins to finish off the arrangement.  I trimmed off the leaves that were over hanging off the card.
Thanks for dropping by today, I hope that you have enjoyed my little card for today.

Happy Stampin' 
Rick Adkins 

If you live in the US.  I would love you to choose me as your demonstrator.  If you would like to purchase any of these products you can click on the Shop Now Button or by clicking on any of the images below.  Alternatively, you can also contact me by email to place your order.  Please be sure to use the monthly host code and I’ll send a little something out to you the following month to say Thank You!  

October HOST CODE:  SQ2WWJZN
1.     Spend any amount with me this month and receive the Creative Stampers Tutorial Bundle featuring Fall & Halloween Projects.  Plus get a gift from me in November.
Please remember that if you use the host code you cannot use that order towards my KCRP’s (Kinmon Crafty Reward Points) that would be double dipping and is not allowed.  For more information on KCRP’s click here.  


Three main reasons to Join!  
1.     You Get at least a 20% discount on all your orders while you are a demo.   
2.     You get to join my fun Kinsmon Crafters Team and Private Facebook Group.
3.     Access to directions to all my online classes 

Stampin' Up! Shopping List: 

Sunday, October 20, 2019

Color Inspiration For: The Raven Card

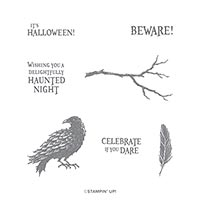
Hello and welcome to my blog; this week we are back with another post for my little color inspiration bi-weekly series.  During this series I am showing you how to find color inspiration for your projects from sources online, life, and in your studio.  This week I am making a Halloween Card.  I used one of my favorite Halloween sets in the 2019 Stampin' Up! Holiday Catalog, that by the way I have tried not to have to have, but finally gave in and purchased this fun spooky set.  Here's a look at my project.  


This week I am pulling my color inspiration from some of our Monster Bash Designer Series Paper.  The color inspiration for today's card came from this little scrap of Monster Bash Designer Series Paper that I found why cleaning my desk while hunting for my Snowfall Accents Puff Paint (which by the way I still haven't found.)  But, I did find this fun quarter sheet of designer series paper.  I didn't use the designer series paper on my card today, I just used it for inspiration.  So, I first pulled my supplies that I thought I would use on my project.  

I knew that this piece of DSP had Pumpkin Pie, Basic Gray, Basic Black, and Whisper White on it, so I pulled some cardstock in those colors as well as my ink pads.  As you can see in these pictures.  I laid everything out to try and figure out what I wanted to use and how.  When I am looking for color inspiration I find this to be a great step to getting started.  


By pulling out all the products that I think match my inspiration I am able to better judge what I want to use in my design.  Now I mentioned above I knew which colors here was in this piece of paper.  You can find that information on the back of the pack of DSP and in your catalog.  Stampin' Up! does a great job of listing all the colors in the DSP to make color coordination easier.  If you ever have a problem finding color inspiration look no further then the back of that DSP that you love so much.  When Stampin' Up! designs their DSP they already have taken the guess work out of the color coordination for us so you know that all those colors listed on the back of it or int he catalog will all work well together.

I did make two versions of this card because I wasn't sure just which way I wanted to go.  I knew I was going to use the Raven Stamp Set on my card, but wasn't quite sure on which way I wanted to use it.   So, I started out with the one on the right with the black center and the white heat embossed raven and sentiment.  Then I did the one on the left with the white background and the black raven.  Which version do you like better?
Charles picked the regular stamped raven card as his favorite, which was no surprise.  And, after sitting and looking at them both together for awhile I decided that the black raven went more with the color inspiration for today.  So I started out with my cardbase in Pumpkin Pie cut at 4 1/4 x 11 scored at 5 1/2 (you know my standard to go card.)  Then I stamped the single feather image from the stamp set all over a piece of Basic Gray cardstock (4 x 5 1/4) in coordinating Basic Gray ink.  I stamped the feathers in a random pattern to create my own designer series paper background.  Then I stamped the branch and raven in Memento Tuxedo Black ink, which isn't necessarily a very dark black ink but it's black non the less.  I then added the sentiment to the front.
I added the stamped image to a Basic Black mat.  I cut this piece of cardstock to give a very very thin boarder around the stamped image.  I then started layering everything up with my Tombow Multipurpose Liquid Glue.  To finish off the card I stamped a few of the feathers on my Whisper White inside piece and added three of the enamel dots from the Monster Bash Enamel Shapes.  I went with the black dots and didn't use the basic gray ones at all.  I thought this was more striking on the card.
Well, that's all for me today, I am glad that you have stopped by for this part in my Color Inspiration Series.  If you know someone that would like this card or you would like to CASE it please feel free to pin it to your Pinterest board.  You will find a list of all the supplies I used at the bottom of this post.  


Happy Stampin' 
Rick Adkins 

If you live in the US.  I would love you to choose me as your demonstrator.  If you would like to purchase any of these products you can click on the Shop Now Button or by clicking on any of the images below.  Alternatively, you can also contact me by email to place your order.  Please be sure to use the monthly host code and I’ll send a little something out to you the following month to say Thank You!  

October HOST CODE:  SQ2WWJZN
1.     Spend any amount with me this month and receive the Creative Stampers Tutorial Bundle featuring Fall & Halloween Projects.  Plus get a gift from me in November.
Please remember that if you use the host code you cannot use that order towards my KCRP’s (Kinmon Crafty Reward Points) that would be double dipping and is not allowed.  For more information on KCRP’s click here.  


Three main reasons to Join!  
1.     You Get at least a 20% discount on all your orders while you are a demo.   
2.     You get to join my fun Kinsmon Crafters Team and Private Facebook Group.
3.     Access to directions to all my online classes 

 Stampin' Up! Shopping List: 


Saturday, October 19, 2019

Saturday Simple Stamping: #35 Christmas Gleaming

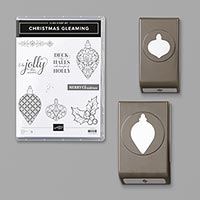
Hello and welcome to this weeks Saturday Simple Stamping Episode.  This week we are making a card using the Christmas Gleaming Stamp Set from the 2019 Stampin' Up! Holiday Catalog.  I decided to make a simple Christmas Card for you today using just stamps, ink, paper and the matching Gleaming Ornament Punches from this suite.  You will find this suite on pages 30 through 32.  You can get both the Christmas Gleaming Stamp Set and matching Gleaming Ornament Punches in a cost saving bundle when you order them using this item #153006.  Here's a look at today's project.

Tips & Tricks: 

For my card today I used a piece of Real Red Cardstock cut at 4 1/4 x 11 scored at 5 1/2 as my card base.  I stamped the large ornament from the stamp set in Real Red ink all around the card base.  I then took a piece of Very Vanilla Cardstock and stamped the two large ornaments and the small in Crushed Curry, Garden Green, and Real Red ink around this piece to create the card front.  I added in the little dot textured stamp from the stamp set in the open spaces around the card.  I made sure that the ornaments where all staggered around the very vanilla card front.  That way it gives you visual interest on the card.   

Once I had that stamping done I added the very vanilla to the card front using Snail Adhesive.  I then added a strip of Real Red Cardstock that I made into a fish tail banner .  I stamped one of the large ornaments and one of the small and punched them out using the matching Gleaming ornament punches and popped them on my card with a couple dimensionals.  I then stamped the sentiment in Tuxedo black ink on a scrap of Real Red cardstock and trimmed it out using my snips.  Since this image has a bold outline and open lettering it allows the colors of the letters to be real red with the outline being black.

Video Tutorial: 


If you are viewing this post via email you may have to click here or on the image below to see the video.  Some email servers will not sure the embedded video.  
Thanks for dropping by today, for this weeks episode of Rick's Saturday Simple Stamping.  I will see you again tomorrow with another post for my bi-weekly color inspiration series.  See you soon. 
Happy Stampin' 
Rick Adkins 

If you live in the US.  I would love you to choose me as your demonstrator.  If you would like to purchase any of these products you can click on the Shop Now Button or by clicking on any of the images below.  Alternatively, you can also contact me by email to place your order.  Please be sure to use the monthly host code and I’ll send a little something out to you the following month to say Thank You!  


October HOST CODE:  SQ2WWJZN
1.     Spend any amount with me this month and receive the Creative Stampers Tutorial Bundle featuring Fall & Halloween Projects.  Plus get a gift from me in November.
Please remember that if you use the host code you cannot use that order towards my KCRP’s (Kinmon Crafty Reward Points) that would be double dipping and is not allowed.  For more information on KCRP’s click here.  


Three main reasons to Join!  
1.     You Get at least a 20% discount on all your orders while you are a demo.   
2.     You get to join my fun Kinsmon Crafters Team and Private Facebook Group.
3.     Access to directions to all my online classes 

Stampin' Up! Shopping List: 


Price: $10.00

Template Designed by creativeworkerbee