Monday, October 14, 2019

Kylie's Demonstrator Training Program Monthly Team Blog Hop


Hello and welcome to my second post for today!  I am back with you again today for Kylie's Demonstrator Training Programs Monthly Team Blog Hop.  This is a wonderful hop and you will see projects from all over the world.  I hope that you will take the time to hop along with us this month.
If this is your first time here welcome, if you have dropped by again welcome back.  Here's a look at the project I am going to be sharing with you today.


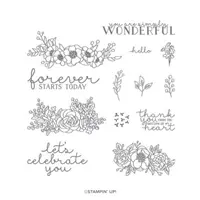
For my card today I created a fun little Fall themed wedding card using the Bloom & Grow Stamp set from the 2019 Stampin' Up! Annual Catalog.  My card is a monochromatic card using only Early Espresso and Copper.  I thought this was a perfect Fall color combination and it uses one of my favorite stamp sets.  I love the Bloom and Grow stamp set but I've not gotten to use it a lot so far this year.  I thought this was the perfect time to do so.  Fall is a big time for weddings and let's face it we can all use a few extra wedding cards that can be used for anytime of the year.
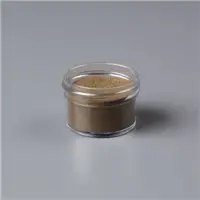
The Bloom & Grow Stamp Set offers beautiful decorative flower bouquets for all occasions.  All for you to color in! Which are just a few of the reasons I love it so much.  It's a perfect set to create all occasions cards with; almost everyone loves flowers and you don't have to use it as a coloring set; just like I did today.  I used it to create a stunning card with just stamps, ink, and paper.  I had the best time creating the focal image in the background and the copper embossing paired with the early espresso is a show stopper.  If you are wondering how I did this; well, it was super easy with my Stamparatus.  I arranged all the large floral images on the card front and closed the stamparatus door on it.  I then stamped in versamark ink and covered that section in copper embossing powder.  I then rotated the card front and repeated the process until I had everything covered.
While arranging the large images I was very surprised at how easily they all lined up, and sort of interlocked with the other images.  I then came back in with the smaller images in the set and filled in any holes I had in my design.  I then took my card front and ran my Versamark Ink Pad along the edge and dipped the edges in the copper embossing powder and heat set.  This created my mat for around the card.  I heat embossed my sentiment in a piece of Vellum Cardstock using the copper embossing powder.  I then cut it out using the Stitched Rectangle Dies and added it to my card front with a little liquid glue behind the lettering.  I then colored some Rhinestone Basic Jewels using my Bronze Stampin' Blend marker, I put a coat on and let it dry and then added another two coats of ink.  Once completely dry I added them to the card front.  I added some on the parts of the vellum that was hanging of on the card front to add a little extra security.  With the addition of the colored rhinestones I was finished with my card.
I hope that you like my little Fall wedding card for this month's blog hop.  If you are viewing this post on my word press site you will have to click here to go and view the blog roll.  The embedded code for the blog roll doesn't play nicely with word press dot com blogs.  So you will have to visit my new blog.

Blog Roll: 


1. Kylie Bertucci - Australia  
2. Margriet Siekman -Netherlands  
3. Danielle Bennenk - Mrs. Brightside  
4. Kylie Swain - Australia  
5. Julie Kight - USA  
6. Libby Dyson - Libby Stampz, Australia  
7. Diane Evans - Canada  
8. Angélique Nederpel - de Stempelkeuken  
9. Jo Hopkins - USA  
10. Tatiana Tobin - Australia  
11. Bonnie Sanche - Canada  
12. Andre Gordon ~ New Zealand  
13. Kurstan del Rosario - USA  
14. Chris Buob, USA  
15. Ellen Liefting, the Netherlands  
16. Karen Henderson, UK  
17. Melva Peters - Canada  
18. Julie Brown - USA  
19. Leonie Stuart - Australia  
20. Narelle Fasulo - Australia  
21. Liz Yuille - UK  
22. Mary Jo Snyder - USA  
23. Lisa McDonough - Canada  
24. Deb Macdowell - Australia  
25. Melinda Whittington - Australia  
26. Sue Allen  
27. Dianne Endersby - UK  
28. Corine van Wijk-The Netherlands  
29. Michele Jutrisa - Australia  
30. Karen Logeman USA  
31. Anne Marie Hile - USA  
32. Kate Bolt. UK  
33. Rick Adkins - USA  
34. Teri Schultz - US  
35. Teresa Cameron - Australia  
36. Cheryl Hamilton- USA  
37. Laurie Bradshaw -USA  
38. Sandra Mastello - Australia  
39. Kelli Metzler - USA  
40. Jessie Holton - Australia  
41. Helen Jennings UK  
42. Michelle Wells - Australia  
43. Rebecca-Jo Unwin- Australia  
44. Jennifer Kirk - Canada  
45. Mandy Witherby - Australia  
46. Sarah Hardy- UK  
47. Cathy Peck - USA  
48. Nature Gibner - Canada  
49. Tricia Butts USA  
50. Christy Gridley - USA  
51. Lori Willcox - Canada  
52. Candice Fields - USA  
53. Alejandra Gomez - USA  
54. Rhonda Kleiman-USA  
55. Ange McKay, North Shore Stamper, Canada  
56. Jessica Brigden - USA  
57. Kerrin Shannon - Art For The Mind - Australia  
58. Janet Raangs-van Wijk- The Netherlands  
59. Jessica Borg - Australia  
60. Colleen Vassos-Canada  
61. Maryanne Mott - USA  
62. Gillian Long - Canada  
63. Valerie Smith - USA  
64. Cheryl McInerney- Australia  
65. Helen Chapman - UK  
66. Kim Heath - Australia  

(Linkup closed)

Happy Stampin' 
Rick Adkins 

If you live in the US.  I would love you to choose me as your demonstrator.  If you would like to purchase any of these products you can click on the Shop Now Button or by clicking on any of the images below.  Alternatively, you can also contact me by email to place your order.  Please be sure to use the monthly host code and I’ll send a little something out to you the following month to say Thank You!  


October HOST CODE:  SQ2WWJZN
1.     Spend any amount with me this month and receive the Creative Stampers Tutorial Bundle featuring Fall & Halloween Projects.  Plus get a gift from me in November.
Please remember that if you use the host code you cannot use that order towards my KCRP’s (Kinmon Crafty Reward Points) that would be double dipping and is not allowed.  For more information on KCRP’s click here.  


Three main reasons to Join!  
1.     You Get at least a 20% discount on all your orders while you are a demo.   
2.     You get to join my fun Kinsmon Crafters Team and Private Facebook Group.
3.     Access to directions to all my online classes 

 Stampin' Up! Shopping List:


Monday, October 14, 2019

Five Fun and Easy Cards using Fall Leaves to Inspire You

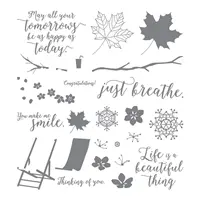
Hello and welcome to my blog; today I am going to share with you five fun and easy projects using Fall leaves that will inspire you this season.  I used the Colorful Season Stamp set and matching Seasonal Layers Dies to create all the projects for today's post.  Here's a look at the projects.


As I mentioned before I used the Colorful Seasons Stamp Set and matching dies to create the projects I am going to share with you today.  I may have gotten a little carried away with the Fall leaves, I am just saying.  The Colorful Seasons Stamp Set is a great one to own because you have images to create projects for every season.  Summer, spring, winter, autumn... I  don't care what season it is...you'll stamp for all of them with this set and you'll have fun doing it! The Colorful Seasons Stamp set is a Photopolymer set featuring 24 photopolymer stamps.  Photopolymer stamps are totally transparent for perfect image placement.  They have just enough give to create a perfectly stamped image every time.  And, they cling like crazy to our clear blocks so you don't have to worry about slipping.  You can save space—you need only one set of blocks for all your photopolymer stamps (blocks sold separately).  They come packaged in cases with images on the spine for easy storage and quick reference.
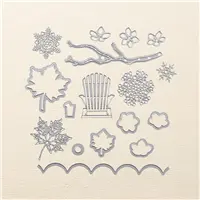
Plus when you add the matching Seasonal Layers Dies you can create custom die-cut patterns and shapes like flowers, leaves, snowflakes, a branch, a chair, and more in record time using the Seasonal Layers Dies.  Dies help you create unique die cuts with just a quick run through your die-cutting and embossing machine. Detailed dies include ejection holes so you can remove the paper easily.  So you can see why you want to pair both of these products together to make your crafting life easier.

Fall Leaves Projects Tips & Tricks: 

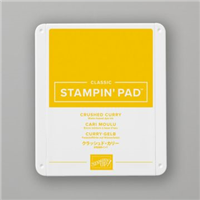
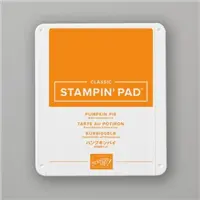
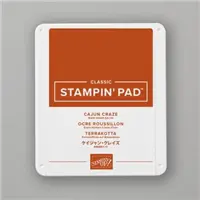
For the first project I used just stamps ink and paper to create a fun card that's very impressive and gives you the quintessential feeling of Fall.  You may be thinking I can not get all those colors on my leaves, but really you can.  I did all those different colors using the Stamparatus our stamp positioning tool.  The Stamparatus allows you to get perfect placement each time with each image.  here's what I did I stamped the large and small leaves at the same time in Crushed Curry ink onto a piece of Whisper White Cardstock.  Without moving the stamp or the cardstock I then used my Sponge Daubers and put on some Pumpkin Pie and Cajun Craze inks.  Just dabbing it here and there where I wanted a different hue to be.    I then stamped the out line image on top to finish the leaves off I repeated this process until I had the card finished.  


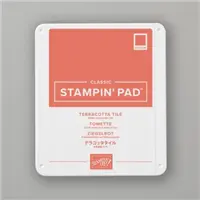
For the next card I used a little more products and added in some copper foil to the mix to give a little wow to the card.  I started out with my card base in Calypso Coral Cardstock.  And added a strip of Soft Sea Foam Cardstock to the front plus two strips of Copper Foil to accent the foil leaf that I die cut with Seasonal Layers Dies.   I stamped the leaves from the stamp set on to two pieces of Whisper White cardstock in Terracotta Tile and Soft Sea Foam ink.  And, placed a third in the center to pop up the foil leaf.  I stamped the sentiment below with Terracotta Tile ink.
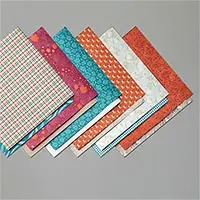
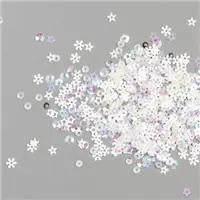
For the third card I threw in a little Come to Gather designer series paper to one side of a Terracotta Tile Card Base.  I added a little strip of whisper white cardstock to under the designer series paper and three of the leaves, two where stamped and die cut and one was the more detailed die cut.  I then added some of the snowflake sequins from the Holiday Catalog to finish it off.

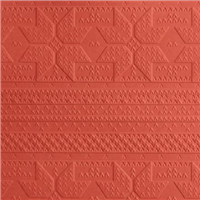
The fourth card I created I used scraps of different designer series paper, past projects that didn't make the cut (pun not intended) and some gold foil and cut them into strips and added them to a strip of cardstock with snail adhesive.  I keep all these strips in the same color family the only difference was the size of the strips.  I then added it behind my card front that I embossed with the Winter Knit 3D Embossing Folder.  I did cut a section a little smaller than my insert out of the card front.  I then added two small strips of real red cardstock to the insert to tie everything in.. I then added one leaf and stamped it the same way as I did with the first card but I added gold embossing to the outline of the leaf.  before cutting it out and popping it up on the card.  
For my final card today, I went all out and created a shaker card.  My window openings were made using the open leaf die from the die set.  I cut tree from a piece of the Come to Gather Designer Series Paper.  I picked matching colors for the rest of the card.  After cutting the openings I add a piece of window sheet to the back cut to size with strong adhesive.  I then used the foam adhesive strips to make my wells for each window.  I used the iridescence sequins in one the Woven Thread sequins in the second one and some fall sequins from a past paper pumpkin kit for the last.  I then added a piece of matching cardstock to the top back to enclose my opening.  I figured out with a lot of time killed that if you cut the backing the same size as the front you don't have to fuse forever to get the sequins covered and to stay in the well.  I then added that to a Purple Posey cardbase with a Soft Sea foam mat.  The sentiment was embossed with Gold Embossing Powder on a piece of Vellum Cardstock.  
That finishes my five Fall Leaves projects for you today.  I hope that you have enjoyed this post and you are inspired to play with some Fall Leaves.  I will see you again tomorrow for another project.  
Happy Stampin' 
Rick Adkins 


If you live in the US.  I would love you to choose me as your demonstrator.  If you would like to purchase any of these products you can click on the Shop Now Button or by clicking on any of the images below.  Alternatively, you can also contact me by email to place your order.  Please be sure to use the monthly host code and I’ll send a little something out to you the following month to say Thank You!  


October HOST CODE:  SQ2WWJZN
1.     Spend any amount with me this month and receive the Creative Stampers Tutorial Bundle featuring Fall & Halloween Projects.  Plus get a gift from me in November.
Please remember that if you use the host code you cannot use that order towards my KCRP’s (Kinmon Crafty Reward Points) that would be double dipping and is not allowed.  For more information on KCRP’s click here.  


Three main reasons to Join!  
1.     You Get at least a 20% discount on all your orders while you are a demo.   
2.     You get to join my fun Kinsmon Crafters Team and Private Facebook Group.
3.     Access to directions to all my online classes 

 Stampin' Up! Shopping List: 


Price: $49.00

Template Designed by creativeworkerbee