Tuesday, March 19, 2019

Best Catch Double Slider Birthday Card

Best Catch, Masculine card, Stampin' Up!, Rick Adkins
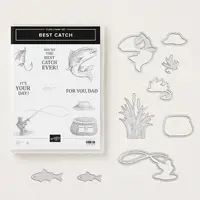
Hello and welcome to my blog; today I am going to share with you a fun masculine card that has a little secret!  The recipient will love this card that is filled with masculine charm.  If you have a fisher man in your life you will differently want to grab this bundle before it's gone.  I came up with fun colored card for you today, it actually is my favorite types of cards, looks very impressive but actually pretty easy to put together once you have seen it one time.  I will be sharing with you this afternoon on my YouTube Live at 4:00 pm CST how to create this very card.  So you will want to catch me there to see just how I created this card.  

Best Catch, Masculine card, Stampin' Up!, Rick Adkins
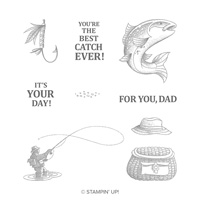
This was actually a very fun card to do; it is a little time consuming with all the die cutting and coloring.  I started out my stamping all the images that I was planning on coloring in tuxedo black ink.  I then stamped a few images in early espresso ink including both sentiments.  This I found spread up the process.   Another little trick to speed things up is instead of cutting all the cattails out of different colors and paper piecing them together, why not just color them out of whisper white cardstock and just color them all with your stampin' blends.  This way you can have whatever card stock you want with having to cut each color and then cut out each little piece and piece them back together to get the look that I got here.  

Best Catch, Masculine card, Stampin' Up!, Rick Adkins
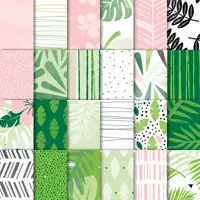
Once I had everything cut out and ready to go it was time to start putting everything together.  I used a piece of the Tropical Escape designer series paper as the background.  I picked a simple pattern.  I am so glad that I did the piece that I picked reminds me of water flowing.  You will be able to see later today how I did just that either on my YouTube channel during my live or you can check back here later on this evening I will upload the live replay here so you can watch.  
Best Catch, Masculine card, Stampin' Up!, Rick Adkins
See I told you that this card had a little surprise to it.  When you pull the little tab up you get to see another sentiment and a fish jumping from the water behind that cattails while the fisher man is casting his line.  On the pull tab I used the circle tab punch to create the pull.  The piece of cardstock that is under the pull tab was a small piece of crumb cake that I pulled from my scrap pieces and ran through the Big Shot with the Basket Weave Dynamic Textured Impression Embossing Folder.  Once this was done I sponged the pull handle with a little early espresso ink to give it a little something something.  

Video Tutorial: 


Best Catch, Masculine card, Stampin' Up!, Rick Adkins
I stamped the Happy Birthday Sentiment in Early Espresso on a piece of whisper white cardstock.  The sentiment came from the Picture Perfect Birthday Stamp Set from the Annual Catalog.  I then used the stitched rectangle dies to cut it out.  I then added another fish to the front along with the hat from the stamp set (which was colored with stampin' blends) and the fishing fly.  This finished off the card lovely.  
Thanks for dropping bye today, You will find a full list of supplies in the shopping list below.  I hope that you have enjoyed my card today.  I also hope that you will join my this afternoon for my YouTube Live.  Again I will go live at 4:00 pm CST on my channel.  

Happy Stampin'
Rick

Stampin' Up! Shopping List: 


Price: $110.00


Monday, March 18, 2019

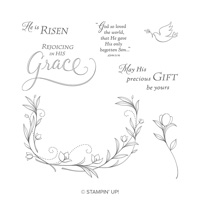
No Line Stampin' Blends Coloring featuring His Grace Stamp Set

Hello and welcome to my blog; today I am going to share with you a card that I created for my churches card ministry back in January.  This is the second card that I created for that month.  Each week we pick a sister church and send them a card letting them know that we are praying for them. Each person in the congregation signs the card.  The hardest part that we have is actually getting the card around the right way.
I used the His Grace Stamp Set, and did a little no Line coloring to create my card.  I love the simple subtle images in the His Grace Stamp Set.  This stamp set is a Easter set, but Has a few sentiments in it that make it a versatile set.  Here's a look at my card.

This is a super clean and simple card, and I love how the simple no line coloring turned out.  Well this is not really the way you do no line coloring but it is my super simple way of doing it and a super easy way of adding a little drop shadow to some of the images.  Each month I make sure when I am designing the cards I always have a little purple in it.  Purple is one of our church colors.  I have a really cute one for this month that I will share with you in another post later on this week.

Video Tutorial: 


Tips & Tricks: 

I started out by stamping the largest floral image in soft sea foam ink and then the little single flower.  I then did a little coloring.  To get the super soft look I prefer to feather the ink starting with the darker color and then doing the same thing with the lighter.  

Thanks for dropping bye today, I hope that you have enjoyed my little card, and just remember that this card could go to anyone for any occasion.  You can find all the supplies I used in the shopping list below.  

Happy Stampin'
Rick

Stampin' Up! Shopping List: 


Saturday, March 16, 2019

First Steps Baby Card for this weeks Saturday Simple Stamping


Hello and welcome to my blog, I am super glad you're here.  If this is your fist visit welcome if  you are returning welcome back.  Today, it's time for another Saturday Simple Stamping post.  If you are unfamiliar with simple stamping I will explain it a little for you.  Simple Stamping is geared toward the person that has not touched a stamp, but want to learn stamping and paper crafting.  It is mostly cards made with just stamps, ink, and paper.  This is a way to share projects that with you if you are a beginner that are easily reproduced, and easy to create but look impressive.   Because there's nothing like putting stamp to paper for the first time. 

For this weeks episode I have a super cute baby card for you today.  My card uses the First Steps Stamp Set.  Which is a great little set that features imagery that can be used for both a baby boy & a baby girl.  Which is the way I designed today's Simple Stamping card.  I wanted to share with you a super easy card that you can easily recreate multiple times if needed.   I know that you are dying to see today's card.  So here is a little look at my card. 


I designed this card as a one layer card which makes it super easy.  I wanted to design this card as a one layer card because I knew I was going to design it as a unisex baby card.   It's nice to have a card designed for either or; one you can create a few of these at once and keep them on hand for the times you need one.  But, with this stamp set it's super easy to create a few of them with either sex in mind.  
Since we are making a one layer card, without any layers, I thought it maybe important to share a few tips with you.  One of the biggest tricks in paper crafting and card making is the card base.  There's a difference between card stocks.  The regular whisper white cardstock is a all around cardstock.  Its actually meant to be for stamping on with it's ultra smooth surface.  The thick whisper white is for card bases.  You want to use the the thicker cardstock for card bases because it is thick enough to stand up to a lot of abuse.  It will stand up easier since it's the thick cardstock where the regular whisper white will buckle much easier when made into a card base.  You can still even stamp on the thick whisper white it also has a nice smooth surface, not quite as smooth as the regular, but still smooth enough to give you a nice stamped impression.  Which is why it was the perfect choice for my one layer card.  

Video Tutorial: 


I hope that this series has inspired you to take up one of the most fun crafts out there.  And that I can help guide you in your new journey through the world of paper crafting.  I have a new Saturday Simple stamping post each week, so make sure you subscribe to my channel and my YouTube Channel.  If you need any of the supplies you have seen today I have a full list of all the items that I used in the Shopping List below.  You can just click on the item on the list and it will take you to my online store as well as the shop tab will get you there.  

Thanks for dropping bye, I hope you have a great weekend, crafting.  

Happy Stampin'
Rick 


Please considering using my Host Code this month on orders of $50 (before shipping and taxes) and I will send you two free PDF printable tutorials and a handmade thank you card as a thank you gift.  Please don't use the host code if your order is $150 or over you will then qualify for Stampin' Rewards.  And you can use them toward the purchase of the Starter kit (which is just like signing up for a Costco Membership besides you actually get products for your membership instead of a card with a photo worse than your driver license) or you can use them on just products.  

Stampin' Up! Shopping List: 


Friday, March 15, 2019

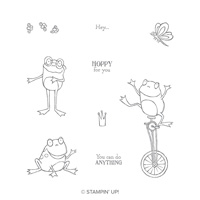
Kathy's So Hoppy Together Easel Calendar Card

Hello and welcome to my blog; today I am going to share with you the card that my friend Kathy Jenkins designed.  She gave me one of these cards and one other for my birthday.  She taught her monthly card club how to create this same easel card in February.  We also attend another friends team meeting and each person that comes takes turns doing a project and she shared this with everyone this month.

This is the card that Kathy gave me for my birthday, if you notice in the picture of her card above you will see my birthday circled.  I did my version of her card Wednesday night during my Facebook Live this week.  I's actually a very easy card to create, as you all know I love cards that are easy to create but look very impressive.  She got her little calendars at her local pharmacy.  They actually gave her them after they handed out all they could before the New Year and still had a surplus.  
This is the version that I created with the supplies she brought to the downline meeting Monday night.  Kathy stamped the frog on the little panel at the top while I stamped mine on a additional piece of cardstock and then used the sold out matching Saleabration Coordination framelits and cut it out.  I then popped it up on the card using a couple stampin' Dimensionals.  You can download a PDF tutorial of this card by clicking here.  You can also watch the tutorial that I did on Wednesday by clicking on the video below.  

 
I loved this card so much that I had to share it with all of you.  I mentioned that Kathy got her calendars at her pharmacy but you can find them online in multiple places.  I know that you can find them on Amazon.  
Thanks for dropping bye today and I hope that you have enjoyed my card today, and that you will give it a try.  You will find a full list of the supplies used in the shopping list below.  You can order in my online store 24/7 by clicking on the shopping tab above or by clicking on the product in the list below.  Remember to use my host code for a special gift with orders of $50.00 (before shipping & taxes).  

Happy Stampin'
Rick

Stampin' Up! Shopping List: 


Template Designed by creativeworkerbee