Showing posts with label simple watercolor. Show all posts

Tuesday, September 24, 2019

14 Techniques and Tips for Using the New Delicata Metallic Inks

Hello and welcome to my blog; today I am going to share with you a few tips and tricks with using the NEW Delicata Metallic Inks.  I have tried a lot of the metallic inks on the market and I have never found one that like until now.  I find that the Delicata Metallic Inks have great coverage and are easy to work with.   I have created a video for you where I just had a little play time to create some card fronts or just to see what these inks will do.  I just cut a lot of 4 1/4 x 5 1/2 pieces of cardstock in various colors and just played.  I have compiled a list of the techniques for you in today's post.  Let's get started shall we.

There are three new Delicata Inks and ink refills in the Stampin' Up! Holiday Catalog this Year; Golden Glitz, Celestial Copper, and Shimmery Sliver.  These inks add amazing shine to your projects be it with just stamping them or any other fun technique you try.

Techniques Using Delicata Inks: 

  • Stamping:  Yes just plain old stamping!  These Inks stamp wonderfully on both Whisper White Cards stock and colored cardstock.  I did find that they dry faster on the colored cardstock rather than the Whisper White.  The Whisper White cardstock is a much smoother service and takes just a little longer for the inks to set into the paper.  You will notice that the inks do show up a little more on the colored cardstock.  
All three inks on Whisper White 

All three inks on Basic Black 
  • Fine Line Stamping:  I too a fine line open image and stamped the each of the inks on a colored piece of cardstock.  And they stamped beautifully.  They look a better than this picture shows them.  

  • Border Stamping:  You can stamp them in a row to create a border or use a border stamp.  
  • Using Background Stamps:  These inks work great on Background stamps.  Depending on how you ink your stamp you can get some great looks.  I really like the silver image in this picture.  
  • Ink Smooshing:  The Delicata Inks work great for the Ink Smooshing technique.  Since they are water based they act nicely with water, and creates beautiful effects.  

  • Splatter and Watercolor Washes:  You can water these inks down to a cream consistency and create a beautiful splatter or watercolor background wash.  You can get a nice gradient of color.  Some of the inks are a little more transparent than others so something to be aware.  

  • Dragging:  You can easily drag the ink pad across your projects to create a fun textural look.  

  • Stencils:  They work nicely through a stencil no matter which application you use.  


    • Monoprinting:  Before you clean you stencil press it to another piece of cardstock and transfer the left over ink.  Do this a few times and create a fun textural background without any extra work.  


    • Reverse Embossing:  Ink up the raised side of your embossing folder to transfer the ink to the little nooks of the indented cardstock.  


    • Embossing:  Ink up the most solid side of the embossing folder to transfer all the ink to the raised areas of the cardstock. 

    • Sponging:  Ink up a sponge and just sponge your paper to create a fun looking textural background.  (Not Pictured)  Use all three ink colors for a super fun look 
    • Heat Embossing:  You have a little time once you stamp your image to add embossing powder to the ink and heat emboss it.  It works better if you use the same color embossing powder as the ink.  For example Golden Glitz with Gold embossing powder.  (Not Pictured) 

    Clean Up:  

    Cleaning up these inks are easy.  The recommended cleaner for these pigment inks is Stazon Cleaner but I did find that you can clean them off your photopolymer stamps with just soap and water.  Make sure that you clean them as soon as you are done.  You don't want to let them sit on your stamps or stencils very long because they will dry quickly.  I recommend that you clean them ASAP as soon as your done stamping them.  You do have a little more time on photopolymer but not excessive stamping sessions.  

    Video Tutorial: 

    .

    If you are viewing this post by email you may have to click here to see the video.  Some mail servers will not show the embedded video.  

    Thanks for dropping by today I( hope that you have found this tutorial helpful and and that you have found some useful information.  If you live in the US.  I would love you to choose me as your demonstrator.  If you would like to purchase any of these products you can click on the Shop Now Button or by clicking on any of the images below.  Alternatively, you can also contact me by email to place your order.  Please be sure to use the monthly host code and I’ll send a little something out to you the following month to say Thank You!  
    Happy Stampin' 
    Rick 


    Product List

    Wednesday, July 10, 2019

    Royal Peacock Card

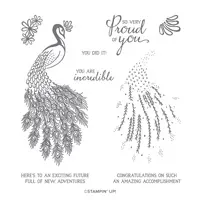
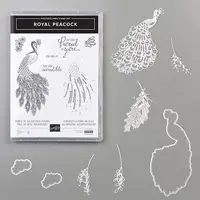
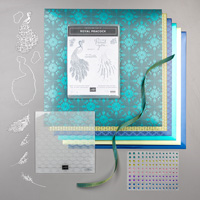
    Hello and welcome to my blog; today I am going to share with you may card using products from the Noble Peacock Suite.   Noble Peacock!  This suite has all kinds of shinny things in it.  It has foil, foiled specialty Designer Series paper by the way that's a great weight for 3d projects, rhinestones and a wonderful Peacock Stamp Set.  Here's a look at my card.

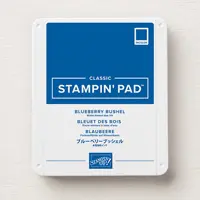
    I started off with stamping the Peacock with Blueberry bushel and Pretty Peacock inks using the Stamparatus.  I stamped both colors at the same time.  I then added the second layer of the peacock image by stamping the second layer of feathers with versamark.  Then I added gold stampin emboss powder on top and heat set it.  This added just the right amount of texture to the peacock.  I then used my wink of stella to color the top part of the Peacock.  This gave the perfect watercolor look with a couple simple steps.  
    I added the designer series paper to a piece of whisper white cardstock as a mat.  The I cut a piece of blueberry bushel and ran it through my embossing machine with the Beads and Baubles Embossing Folder.  I then added that to a piece of whisper white cardstock as a mat.  Since I did die cut the peacock out after stamping it using the matching dies I wanted to add a little white to the card and break up the Blueberry Bushel just a little.  
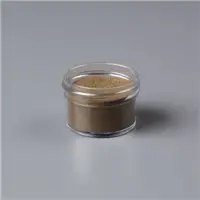
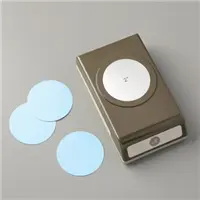
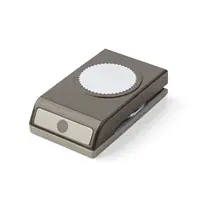
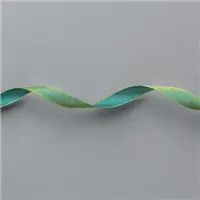
    I heat embossed my sentiment on a piece of Blueberry Bushel cardstock using versamark & gold embossing powder once heat set I punched it out using a 2" circle punch.  I added some of the Pretty Peacock Foil behind the sentiment.  I used the starburst punch to punch that out and mounted it with Stampin' Dimensionals.  I added a knot made from the old olive/pretty peacock reversible ribbon with a mini glue dot.  To finish off my card I added some of the Noble Peacock Rhinestones around the card.  The rhinestones are currently on backorder but will be in stock soon.   
    I hope that you like my Monochromatic card today.  If you need any of the supplies that I used you can pick them up in my online store 24/7 by clicking on the shop tab above or by clicking on the items in the Shopping List Below.  I look forward to working with you and being your demonstrator.  
    Happy Stampin'
    Rick

    Stampin' Up! Shopping List: 

    Price: $49.00

    Host Code and Free Gift:

    July Host Code:  J2YFZZ34
    This host code and offer only good from June 30, 2019 till July 17, 2019.

    1. Spend any amount (using this month’s host code) and get the July Creative Stampers Tutorial Bundle FREE (This month we are featuring products from the Follow Your Art Suite in the 2019-2020 Annual Catalog)
    2. Spend $25 (before taxes and shipping) or more using this month’s host code and get the my July Monthly Card Class Make & Takes Mailed to you FREE as a Thank you.
    3. Spend $75(before shipping and taxes) or more and get the July Monthly Make & Take Class and a bolt of the Tricolor Ribbon for FREE as a Thank You gift when you use this month’s host code.
    4. Spend $150 or more and get the July Creative Stampers Tutorial Bundle, July Monthly Card Class Make & Takes, & a Bolt of the Tricolor Ribbon for FREE as my thank you.  If your order is over $150 please don’t use the host code.  You will give up your Stampin’ Rewards if you do. 


    Please remember that if you use the host code you can not use that order towards my KCRP’s (Kinmon Crafty Reward Points) that would be double dipping and is not allowed.  For more information on KCRP’s click here. 
    You have to ways to get the July Creative Stampers Tutorial Bundle.  1.) Earn it FREE with a qualifying order (see above host code information).  2.) You can purchase it from my Tutorial Store for $20 US by clicking here as a Instant Download.  This month's Creative Stampers Tutorial Bundle features 8 projects using products from the Follow Your Art Suite.  
    Now's a great time to shop!  For every $50 you spend in my online store Stampin' Up! will send you a $5.00 Coupon code by email to use toward your orders in August.  Click here to shop! 


    Now's the perfect time to join my family of crafters!   With the Extra Extra Joining Special!  When you Sign up between July and August you can add an EXTRA $30 in products to your $99 Starter Kit.  SO you are picking $155 in products with FREE shipping.  The following month after you sign up you get an EXTRA $10 coupon Code emailed to you to use that month.  

    Sign Up Now!  


    Slizzin’ Summer Promotion:
    Summer's here and I am ready to beat the heat!  To celebrate Summer, I am going to run a three month promotion with the chance to earn a prize in September!  I will be giving away a few prizes from the Holiday Catalog in September and you can get your name in the Coconut now!  

    Template Designed by creativeworkerbee