Thursday, October 14, 2021
Thursday, September 30, 2021
Through It Together Fall Gift Box - 3D Thursday Project
September 30, 2021 3d thrusday project, 3D Thursday, Beauty of the Earth DSP, Fall gift box, fall leaves, gift box Leave a Comment
Thursday, September 23, 2021
No Tombstone Treat Box - 3D Thursday & Free Project Sheet
Hello and welcome to my blog! I hope that you are doing well today and I am glad that you are visiting with me. Jo Anne Hewins from https://luv2create.typepad.com/ is our team designer this week. Check out her a wonderful project below.
Thursday, March 19, 2020
Peaceful Moments Lidded Poppy Box
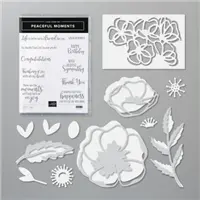
Hello ans welcome to my blog; today I am going to share with you my Lidded Poppy Box, that I made. I used the Peaceful Moments Bundle for my flower and sentiment and created this super cute little box for you today. The Peaceful Moments Bundle includes the Peaceful Moments Stamp Set and the Poppy Moments Dies. Create fancy, layered die-cut poppies, leaves, and more to add beauty and depth to your handmade cards, scrapbooks, journals, and other paper crafts using the Poppy Moments Dies. Pair the dies with the coordinating Peaceful Moments Stamp Set to add heartfelt sentiments to your projects for birthdays, congratulations, sympathy, thank you, and more. Here's a look at today's project.
Tips & Tricks:
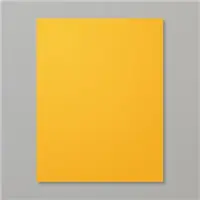
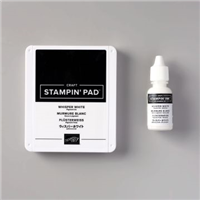
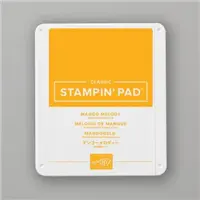
Stampin' Up! Shopping List:
Thursday, December 19, 2019
Toile Tidings Large Chocolate Truffle Box
Hello and welcome to my blog; today I am going to share with you the Large Chocolate Truffle Box that I made during last nights Facebook Live. I do a Facebook Live each Wednesday at 8 pm CST on my Facebook Business Page. This is a large box that's holds a half a bag of Lintz or Moser Roth Truffles. This box measures 7" x 2" x 2", so you can see it's a great size for gift giving. For my project today I used the Toile Tidings Designer Series Paper to decorate my box. Here's a look at my project.
As I mentioned I used the Toile Tidings Designer Series Paper to decorate my box today. The base of the box was made with cardstock. I used either Real Red or Garden Green for the base and then the other color for the mats for the designer series paper. I used the same color of the box base for the designer series paper. With the Toile Tidings it was super easy to pick which color to use. There are only three colors in the designer series paper; Very Vanilla, Real Red, and Garden Green. The same pattern is on each side of the paper but in either Very Vanilla and Real Red or Very Vanilla and Garden Green so it makes creating super easy.
The Real Red version was the first one that I made for my Facebook Live. I used the 1" Real Red Ruched Ribbon to tie the box close. This box uses one full sheet of 8 1/2 x 11 cardstock to make the base. I scored the base cardstock on the short side at (on the 8 1/2" side) at 2, 4, 6, and 8. On the long side (11" side) I scored at 2" and 9".
The box was decorated with three pieces of cardstock (cut at 6 3/4 x 1 3/4) for the front, top, and back. The two side mats were cut at 1 3/4 x 1 3/4. The Designer Series Paper for the box was cut at 6 1/2 x 1 1/2" (you need three) and 1 1/2 x 1 1/2 (you need two). To add a little more decoration I used ribbon to secure it close. I used the Garden Green Double Stitched Ribbon and the Very Vanilla & Copper Classic Weave Ribbon on the Garden Green Box.
Video Tutorial:
Sizes & Dimensions:
- Real Red or Garden Green Cardstock (Base) - 8 1/2 x 11
- Real Red or Garden Green Cardstock (Mats) - (2) 1 3/4 x 1 1 3/4, (3) 6 3/4 x 1 3/4
- Designer Series Paper - (2) 1 1/2 x 1 1/2 (3) 6 1/2 x 1 1/2"
- Spend any amount with me this month and receive the
Creative Stampers Tutorial Bundle. Plus get a gift from me in January.
Stampin' Up! Shopping List
BLOG ARCHIVES
-
►
2021
(222)
- December (16)
- November (17)
- October (21)
- September (23)
- August (13)
- July (18)
- June (26)
- May (26)
- April (15)
- March (6)
- February (19)
- January (22)
-
►
2020
(303)
- December (18)
- November (27)
- October (22)
- September (16)
- August (30)
- July (24)
- June (14)
- May (30)
- April (28)
- March (33)
- February (29)
- January (32)
-
►
2019
(318)
- December (23)
- November (31)
- October (37)
- September (26)
- August (28)
- July (28)
- June (32)
- May (20)
- April (28)
- March (34)
- February (26)
- January (5)


