Showing posts with label card making for beginners. Show all posts
Showing posts with label card making for beginners. Show all posts
Sunday, May 24, 2020
Tips & Tricks of Refilling Your Ink Pads
Hello and welcome to my blog; today I have a quick little tip video for you on refilling your ink pads. This is something that we all must do to keep our ink pads working properly. Or, you can just toss it and buy a new one, believe me I feel you, but refilling is so much cheaper. And not as hard as you may think.
All you really need is your ink pad, an ink refill, and a plastic spoon. Once you have these basic items on hand you can quickly and easily refill your ink pads without too much of a mess; unless you are like me and get ink everywhere. If you are, bless you I feel your pain. But in all honesty, it is not that hard.
Now, as I mentioned above, I do not use any fancy tools to do this I just bought a box of plastic spoons from the store and I use the back of it. And I clean it off when I am done with a baby wipe so one spoon will last you for a while. I simply take a few drops of my chosen ink refill and put on my ink pad and move the ink around with the spoon and press it into the pad a little. It does not take a lot of pressure you really want gravity to do the work for you. The ink will soak into the pad.
You can also look at the side of the pad to see if color of the foam is getting darker. As the ink soaks into the pad you will see it soaking into the pad. But the spoon allows you to spread the ink around the pad so that you have good coverage. Now another little tip is you can use this same technique to move ink out of your way if you are using a distinktive stamp. These types of stamps work better with an ink pad that is not as juicy. In this situation to much ink is not your friend.
Now, one thing that I like to do after refilling my ink pad is: I like to let it sit for a little while before I use it. A freshly inked pad can still be to inky, so you do have to watch the amount of ink refill you put on. To me it is best to do a little let it sit and come back and add more if need be. Ink pads can be a finicky little so and so, but if you know how to take care of them when they are low on ink it will make your life so much easier.
Another piece of advice I have for new stampers and well any stamper is to make sure when you order your ink pad go ahead and get the ink refill as well. That way you will have one on hand and want have to wait for one to arrive when you pad is running low on ink.
I hope that you enjoy this bonus video tip this week and it helps you out. I know there’s a lot of new stampers and crafters out there that may not know how to refill their ink pad and may just toss it and buy new or get frustrated and stop stamping because they are not getting the results they want. Remember to get your ink refills at the same time you purchase your ink pads it saves time, money, and heartache.
Happy Stampin'
Rick Adkins
Independent Stampin' Up! Demonstrator
Sunday, May 17, 2020
Celebrate Sunflowers Note Card
Hello and welcome to my blog; today I am going to share with you little sneak peek of some upcoming products with a note card that I Made using the Celebrate Sunflowers Stamp Set, from the 2020-2021 Stampin' Up! Annual Catalog. Here is a look at my project for today.
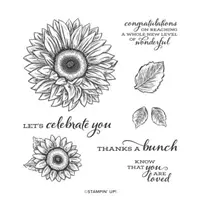
Celebrate Sunflowers Stamp Set:
The Celebrate Sunflower (New in the 2020-2021 Stampin’ Up! Annual Catalog: will allow you to honor and celebrate friendships with heartfelt sentiments and a stunning set of sunflower images. The stamp set features wonderful line art sunflowers and leaves that are perfect to color with your favorite coloring media. The large sunflower image is great for a card front as well as elements on your cards. I featured it today on my note card.
This is a cling mount stamp set so it will stay in place on your block no matter what you are using it for. There are eight stamps in the set four of which are line art images. You have the large sunflower, which is one of my favorites, a smaller sunflower image with leaves attached, and two sets of different size leaves. Along with some great mixed font sentiments. The deeply etched images will give you excellent detail as you can see with my little note card today.
Note Cards Perfect for Any Reason:
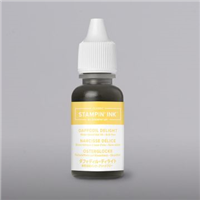
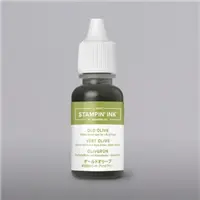
I used the large sunflower to stamp all over my note card in Daffodil Delight Classic Ink. I stamped it in a triangular pattern to add visual interest to the note card. I then added the large leaf image stamped in Old Olive Classic Ink to fill in some of the white space on the note card. This is a perfect example of some simple stamping. Anyone could create this not card, from beginning crafters to someone that has been doing it for years that just needs to make a bunch of cards quick.
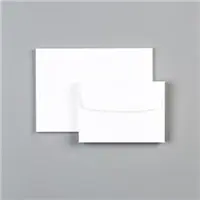
I love to make note cards for some occasions because they are the perfect size to be tucked into someone’s lunch, bag, or anywhere. Plus, they come in a pack of 20 with envelopes so you have plenty to work with. Another great thing about them is they are ready for you to make and send, no cutting needed if you do not want to add any additional layers. I only added one additional layer to my note card today. I stamped the sentiment on a piece of Daffodil Delight Cardstock after stamping the sunflower image on it. First, I stamped the sunflower off before stamping on the 1 1/16th x 2 ¾” piece of Daffodil Delight Cardstock. Next, I stamped the sentiment in Old Olive Classic Ink and cut a fishtail banner on one end. I added it to the note card with a couple Stampin’ Dimensionals.
To finish off my note card I did stamp the large sunflower on the front of the envelope to have a matching presentation to the recipient. I also stamped it on one corner of the flap.
Get Your Hands On New Products Before June 3rd:
Thanks for dropping by today, I hope that you have enjoyed my little simple stamping note card, and that you have been inspired to give it a try. Remember that the products in the new catalog can not be purchased until June 3, 2020. If you would like to get your hands on them early you can add them to your starter kit when you join my team this month. The starter kit is always the best deal in the catalog; for only $99 you get to pick out $125 worth of products with Free Shipping. Plus, you get at least a 20% discount on all orders while you are a demonstrator. Think of it like buying a membership to Costco. But, instead of just a membership card you get a discount on all your orders, plus you get to shop a full month early from any of the new catalogs.
Three main reasons to Join!
- You Get at least a 20% discount on all your orders while you are a demo.
- 2. You get to join my fun Kinsmon Crafters Team and Private Facebook Group.
- . Access to directions to all my online classes
Happy Stampin'
Rick Adkins
Use the Host Code on any order of $50 (before taxes & shipping) or more during the month and receive a gift from me in May as a Thank You. If your order is $150 or more, please do not use the host code. You will forfeit your Stampin' Rewards if you do; and I want you to get those rewards.
If you place any size order with me during the month of May, you will receive the May Creative Stampers Tutorial Bundle from me as a little thank you. This month's tutorial bundle features Birthday Bonanza Suite of Products from the January-June Mini Catalog. The Creative Stampers Tutorial Bundle can either be earned for FREE with any size order or Can be purchased for $20 from me.
Stampin' Up! Shopping List:
Saturday, January 18, 2020
Simple Stamping Birthday Card - Little Ladybug Saleabration Host Set
Hello and welcome to my blog: Simple stamping was started to help the new and beginning stampers to have ideas and inspiration as well as learn the basics. Today I am going to share a Simple Stamping Birthday Card using the Little Ladybug Saleabration Host Stamp Set. This is a super cute stamp set that can be earned with a qualifying order of $300 during Saleabration. I am super in love with these cute little ladybugs and all the sentiments in this stamp set makes this set a perfect one for every occasion. I will also share with you two designs for the Casual and Avid stampers during this post. Here's a look at my card.
For today's simple stamping card I used just stamps, ink , and paper. These are the basic supplies along with a little adhesive that anyone needs to create a card. You can create wonderful cute cards with just these few supplies. When you are starting out you don't have to have everything in the catalog or stores to create cute projects. I love going back to the basics and using the basic supplies to create. It helps to free my mind and allows me to think creatively to create more involved projects.
Simple Stamper Version:
The Simple Stamping version I only used stamps ink and paper as I mentioned above. For my card base I used a piece of Thick Whisper White Cardstock cut at 4 1/4 x 11 scored at 5 1/2. I used Poppy Parade ink and stamped the two little ladybugs in the center right-hand side of the card. I used a blender pen to add a watercolor like look to the wings and little of the body using just my ink pads. This is a easy technique that is good for beginners that don't have a lot of supplies because it will widen your range of coloring media without much investment. I stamped my sentiment on a strip of Highland Heather Cardstock in Gorgeous Grape Ink. I cut a slanted end to draw a little interest. I added a strip of Poppy Parade Designer Series Paper from the Brights Paper Stack cut just a little bigger than the sentiment strip. I then stamped the little line of ladybugs above and below the stamped images and sentiment strip.
Video Tutorial:
If you are viewing this post by email you may have to click here or click the image below to view the video. Not all mail servers will show the embedded video.
Casual Card:
For my casual version of this card I added in the addition of the Everyday Label Punch. I extended the length of the label by cutting the strip of cardstock that I stamped cut just to fit inside the punch. You have to thread the paper through one side of the punch but out the inside of the punch where the only thing being punched is the very end. I did this on both sides and then repeated it with the Highland Heather cardstock. Everything else with the card was done exactly the same, besides I added a few more Champagne Rhinestones. I did pop the punched out piece up on Stampin' Dimensionals.
Avid Card:
For my avid card I added in a few more ink pads and the addition of the coordinating dies. I added in Blushing Bride, Pear Pizzazz and Petal Pink to go along with the Gorgeous Grape and Poppy Parade. I stamped the flower in Blushing Bride and then colored it in with my blender pen and Blushing Bride, Gorgeous Grape, and Pear Pizzazz ink pads for a simple watercolor appearance. For my ladybugs I used the two colors I had previously but also added in a little Petal Pink to their faces and bellies. I then used the Ladybug Dies (which will be coming out in February as part of this years Coordination Product Release. I will have more details on that coming soon. One of the perks of being a demonstrator is you get to order new products early so you could add these items to your starter kit by joining my team.
Thanks for dropping by today I hope that you have found this post inspiring and that if you are not currently a stamper that you will give it a try.
Happy Stampin'
Rick Adkins
Join my NEW Online Technique & Fancy Fold Club! You can find out all the details by clicking here!
Receive the January Creative Stampers Tutorial Bundle with any size order!
Saturday, July 20, 2019
Rick's Saturday Simple Stamping Episode 27: Featuring Garden Goodness
This month we are adding in a little Designer Series Paper with our Simple Stamped Cards. This week I used a piece of the Garden Lane Designer Series Paper, and attached it to a Soft Sea Foam Card base. I then used a 2 1/4 x 5 1/4 piece of Whisper White and stamped two of the avocados using the Rock & Roll Technique.
Video Tutorial:
If you are viewing this post by email you may need to click the image below to view the video.
Tips & Tricks:
Remember that Simple Stamping is normally just Stamps, Ink, & Paper. Each month we may add in one other item, but normally it's just stamps ink and paper. Simple Stampin' was designed to help absolute new stampers or people thinking about getting started to have a wonderful experience learning to create handmade cards. Like I mentioned before I am also showing as you saw in the video how to do the Rock & Roll Technique this time as well.
I stamped two of the avocados using the rock and roll technique and then one more on the on another piece of Whisper White for the inside. I did add a piece of the Garden Lane Designer Series Paper to the front. And that was the really all it was to the card.
To do the Rock & Roll Technique you ink up the stamp in the lightest color ink first. Then you take a darker color ink and the same stamp and tilt it slightly. Then you are going to roll the edge of the stamp in the darker color. Once you stamp it you get the two tone image like above. It looks like a layered stamp but really it's just the one stamp. I then stamped the pit in Early Espresso ink along with the sentiment.
Product Recipe:
I have created this little recipe image that you can pin with some of the main parts of this card except the ink that I used. You can find all the supplies that I used below in the Stampin' Up! Shopping List below. Thanks for dropping by today, I hope that you have a wonderful day and a great weekend.
Sales Tax Holiday:
Sales tax holidays have started in some states and some of our items are included in that. If you don't know what a Sales Tax Holiday is some states give parents with school kids (basically everyone can take advantage of it) a little tax break on these weekends. You can download the PDF of the list here to see if you are in one of those states and see what Stampin' Up! has that's included in that sale. For example Alabama's Tax Free Weekend is this weekend. So if you are one of my customers in Alabama take advantage of these savings.
Happy Stampin'
Rick
Host Code and Free Gift:
July Host Code: J2YFZZ34
- Spend any amount (using this month’s host code) and get the July Creative Stampers Tutorial Bundle FREE (This month we are featuring products from the Follow Your Art Suite in the 2019-2020 Annual Catalog)
- Spend $25 (before taxes and shipping) or more using this month’s host code and get the my July Monthly Card Class Make & Takes Mailed to you FREE as a Thank you.
- Spend $75(before shipping and taxes) or more and get the July Monthly Make & Take Class and a bolt of the Tricolor Ribbon for FREE as a Thank You gift when you use this month’s host code.
- Spend $150 or more and get the July Creative Stampers Tutorial Bundle, July Monthly Card Class Make & Takes, & a Bolt of the Tricolor Ribbon for FREE as my thank you. If your order is over $150 please don’t use the host code. You will give up your Stampin’ Rewards if you do.
Please
remember that if you use the host code you can not use that order towards my KCRP’s
(Kinmon Crafty Reward Points) that would be double dipping and is not
allowed. For more information on KCRP’s click here.
Join me for this years Summer Retreat To Go! You will find all the details here and also you are able to sign up. There's still a few days left to sign up.
Three main
reasons to Join!
I All
Ready Know I Want to Join! Sign Me UP!
Slizzin’ Summer Promotion:
Summer's here and I am ready to beat
the heat! To celebrate Summer, I am going to run a three month promotion
with the chance to earn a prize in September! I will be giving away a few
prizes from the Holiday Catalog in September and you can get your name in the
Coconut now!
Details:
Get your name in the Coconut for some free Holiday Products to be given away in September! Here's how you will earn tokens during June, July, & August!
Details:
Get your name in the Coconut for some free Holiday Products to be given away in September! Here's how you will earn tokens during June, July, & August!
- 1
token for purchasing one of my Online Classes
- 1
token for every $30 you spend during June, July, & August!*
- 2
tokens for referring a friend and they sign up for a class with me &
mention in their email that you referred them
- 5
tokens for joining my team
- 10
tokens for hosting a party online or in your home
Names will all be put into a hat and
drawn live on Tuesday, September 17th at 4 pm CST during my Facebook
Live!
Fine Print:
*Can not be combined with any other special offer This is not a promotion ran or endorsed by Stampin' Up! This promotion is solely ran by Rick Adkins Independent Stampin' Up! Demonstrator This offer is only good for those that live in the United States and prizes can only be won by a US Resident
Now's a great time to shop! For every $50
you spend in my online store Stampin' Up! will send you a $5.00 Coupon code by
email to use toward your orders in August. Click here to shop!
You have to ways
to get the July Creative Stampers Tutorial Bundle. 1.) Earn it FREE with
a qualifying order (see above host code information). 2.) You can
purchase it from my Tutorial Store for $20 US by clicking here as a Instant Download. This
month's Creative Stampers Tutorial Bundle features 8 projects using products
from the Follow Your Art Suite. .
With the Extra
Extra Joining Special, you earn 2 times the Extras! Join my family of Kinsmon Crafters now
and earn an extra $30 in FREE items to add to your $99
Starter kit. That means you can pick out $155 of wonderful Stampin' Up!
Products for only $99. And you get FREE shipping on your starter
kit. Extra #2 You will receive a $10 Coupon Code if
you Sign up in July to use in August. If you sign up in August, your will get
the Coupon Code to use in September. Have questions visit my Join my Team Page and my FAQ page for more details.
Three main
reasons to Join!
1.
You
Get at least a 20% discount on all your orders while you are a demo.
2.
You
get to join my fun Kinsmon Crafters Team and Private Facebook Group.
3.
Access
to directions to all my online classes
I All
Ready Know I Want to Join! Sign Me UP!
Subscribe to:
Posts (Atom)
BLOG ARCHIVES
-
►
2021
(222)
- December (16)
- November (17)
- October (21)
- September (23)
- August (13)
- July (18)
- June (26)
- May (26)
- April (15)
- March (6)
- February (19)
- January (22)
-
►
2020
(303)
- December (18)
- November (27)
- October (22)
- September (16)
- August (30)
- July (24)
- June (14)
- May (30)
- April (28)
- March (33)
- February (29)
- January (32)
-
►
2019
(318)
- December (23)
- November (31)
- October (37)
- September (26)
- August (28)
- July (28)
- June (32)
- May (20)
- April (28)
- March (34)
- February (26)
- January (5)


