Showing posts with label best dressed DSP. Show all posts

Thursday, May 21, 2020

Dressed to Impress Box

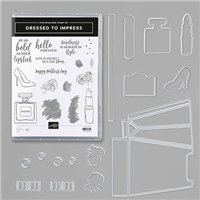
Hello and welcome to my blog; today I am sharing with you the other box that I made last week and told you I would share it with you later.  This is a very famine version of the Beautiful World and Forever Greenery Boxes I shared last week.  If you missed those posts, I have linked them for you above.   With this box I wanted to showcase the Dressed to Impress Bundle and products that are in that suite from the January-June Mini Catalog.  Sadly, most of these products are on the retiring list.   But I am quite sure everything I used is still available.  Here is a look at my project.  

Dressed to Impress Bundle, Best Dressed Designer Series Paper, 3D Project, Rick Adkins, Stampin' Up!

For this box you will need a piece of Petal Pink Cardstock cut at 8 ½ x 10 1/2.  I scored on the 10 ½” side at ½”, 3 ½”, 5 ½” and 8 ½”.  The other two score lines are on the 8 ½” side and they are at 2” and 6 ½”.  I told you it was simple.  The box is made the same as the other two so make sure to check out those post.  The Forever Greenery Box has a video tutorial that walks you step by step on how to make the boxes.  

Dressed to Impress Bundle, Best Dressed Designer Series Paper, 3D Project, Rick Adkins, Stampin' Up!

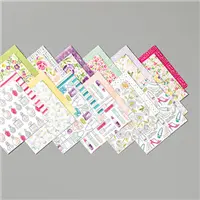
For this box I went with the stripped pattern from the Best Dressed Designer Series Paper Pack and added it to the front, two sides, and top.  I picked Purple Posy Cardstock to mat the designer series paper before adding it to the box.  I thought that the Purple Posy was a great choice to add to the box since it was in my chosen paper.  

Dressed to Impress Bundle, Best Dressed Designer Series Paper, 3D Project, Rick Adkins, Stampin' Up!

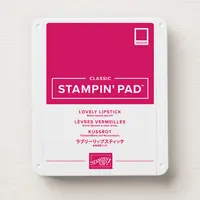
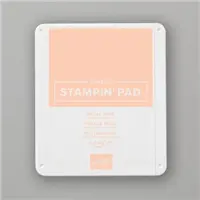
Next, I stamped the lipstick and perfume images from the stamp set in Basic Gray Classic Ink on Whisper White Cardstock and cut them out with the matching dies.  Then I added a little color to each image with the wash image from the stamp set.  There are a couple different size images to color the images without having to color.  I stamped the lipstick base in Basic Gray Classic Ink and the top in Lovely Lipstick Classic Ink.  The inside of the perfume bottle was stamped with Petal Pink Classic Ink.  

Dressed to Impress Bundle, Best Dressed Designer Series Paper, 3D Project, Rick Adkins, Stampin' Up!

After I had the focal images stamped and colored it was time to do a sentiment.  I stamped the Be as Bold as Your Lipstick Sentiment in Basic Gray Classic Ink on Whisper White Cardstock.  And then punched it out with a 2” Circle Punch.  

Dressed to Impress Bundle, Best Dressed Designer Series Paper, 3D Project, Rick Adkins, Stampin' Up!

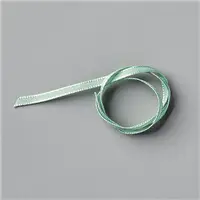
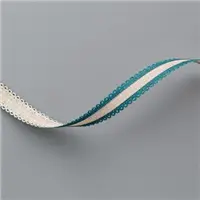
After all the stamping was complete, I took the 1/8” Sheer Mint Macaron Ribbon and tied around the box.  I then layered the perfume bottle and lipstick tube up on dimensionals.  I let the perfume bottle layer over the ribbon but still allowed the ribbon to slide through.  I then added my sentiment on dimensionals.  

Dressed to Impress Bundle, Best Dressed Designer Series Paper, 3D Project, Rick Adkins, Stampin' Up!

To finish off the box I added a few Basic Rhinestones to add just the right amount of sparkle and shine.  Thanks for dropping by today.  If you need any of the supplies you have seen today you can pick them up in my online store from the links below.  

Happy Stampin' 
Rick Adkins 


Use the Host Code on any order of $50 (before taxes & shipping) or more during the month and receive a gift from me in May as a Thank You. If your order is $150 or more, please do not use the host code.  You will forfeit your Stampin' Rewards if you do; and I want you to get those rewards.


If you place any size order with me during the month of May, you will receive the May Creative Stampers Tutorial Bundle from me as a little thank you.  This month's tutorial bundle features Birthday Bonanza Suite of Products from the January-June Mini Catalog.  The Creative Stampers Tutorial Bundle can either be earned for FREE with any size order or Can be purchased for $20 from me.

Stampin' Up! Shopping List: 

Monday, March 16, 2020

Happy Easter - Full of Happiness Stampin' Up!

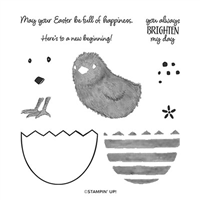
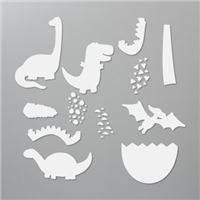
Hello and welcome to my blog; today I am going to share with you a cute little Easter card featuring the Full of Happiness Stamp Set.  Which by the way is my featured item this week and you will see a couple more projects featuring this stamp set later in the week.  The Full of Happiness Stamp Set is a super cute layering stamp set where you build a fun little Easter Chick.   And, it coordinates with the Dino Dies in the Annual Catalog.  Here's a look at today's card.

Tips & Tricks: 

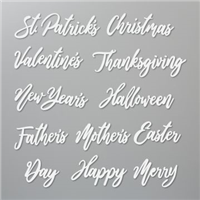
I started off my card by die cutting the words Happy and Easter three times from scrap cardstock using the Word Wishes Dies and then once from So Saffron.  Once I had all the words cut out I glued them together with liquid glue and set them aside to dry completely.  Next I cut all my cardstock and designer series paper to size, for the card base I used a piece of Whisper White Thick Cardstock cut at 4 1/4 x 11 scored at 5 1/2 (Metric would cut at 10.5 cm x 29.7cm).  Then I cut my Purple Posy Cardstock to 3 7/8 x 5 1/8 (Metric cut at 14.2 cm x 9.8 cm).  My Designer series paper which comes from the Best Dressed 6 x 6 Designer Series Paper pack was cut at 3 3/4 x 5 (Metric 13.9 cm x 9.5 cm).  


I used a scrap of Whisper White Cardstock to stamp the chick from the Full of Happiness Stamp Set on.  I stamped my little cutie using So Saffron, Early Espresso, and Mango Melody Classic Inks.  Once it was all stamped out I used my Paper Snips to cut it out.  I then stamped the outline of the end in Early Espresso ink onto a scrap of the Best Dressed DSP and cut it out using the matching die from the Dino Dies.  


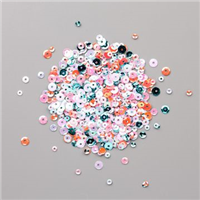
I then added the secondary sentiment to a very small scrap of Purple Posy Cardstock and stamped it in Highland Heather Classic Ink.  This was trimmed down to a small banner so that I could add it to the card below the Happy Easter Sentiment that I added to the card front with liquid glue.  I then added the egg with Multipurpose Liquid Glue and then chick with a few Stampin' Dimensionals.  To finish off the card I added a few of the sequins from the Iridescent Sequin Assortment to add a little bling and spring feel to the card.  


Thanks for dropping by today I hope that you have been inspired to give this card a try and that you are getting ready for Easter.  If you need any of the supplies you have seen today you can order them in my online store by clicking on the items in the shopping list below.  
Happy Stampin' 
Rick Adkins 


Use the March Host Code on any order of $50 (before taxes & shipping) or more during the month and receive a gift from me in April as a Thank You.  If your order is $150 or more, please don't use the host code.  You will forfeit your Stampin' Rewards if you do; and I want you to get those rewards.


If you place any size order with me during the month of March, you will receive the March Creative Stampers Tutorial Bundle from me as a little thank you.  This month's tutorial bundle features fourteen floral themed tutorials.  The Creative Stampers Tutorial Bundle can either be earned for FREE with any size order or Can be purchased for $20 from me.

Stampin' Up! Shopping List: 


Thursday, February 20, 2020

Three cards using Breathtaking Bouquet Background Stamp - Stampin' Up! (Facebook Live Mini Class)

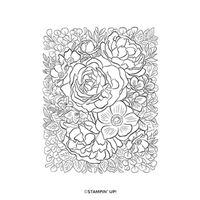
Hello and welcome to my blog; today I am going to share with you the cards that I made during my Facebook Live Mini Class last night.  Each week on Wednesday I do a Free Facebook Live Mini Class featuring a stamp set or bundle from one of the new Stampin' Up!'s catalogs.  If you have never joined me during one of my lives I go live every Wednesday at 8 pm CST except the second Wednesday of the month then I go live at 3 pm CST.  Last night I focused on the Breathtaking Bouquet Background Stamp Set as the main focus of my projects, and shared three different ways to use it.  I picked the Breathtaking Bouquet stamp set to feature in last nights mini class because it was one of the stamps I feel in love with when I first saw it in the new January-June Mini Catalog.  I love how all the flowers are perfectly placed and come out just so striking.   Here's a look at my cards.


Video Tutorial: 

If you are viewing this post by email you may need to click here or click on the image below to view the video.  


February HOST CODE: AGA9YBUB
Order by Midnight Monday February 24, 2020 with a minimum purchase of $40 (before shipping and taxes) using the February host code and get tonight’s make & takes free as a thank you gift from me.

Tips & Tricks: 


For my first card I did a little ink blending to start out with Whisper White Craft Ink in the center of the Pretty Peacock cardstock and then I used Pretty Peacock and Night of Navy inks around the edges before heat embossing the background stamp on top.  By starting out on a piece of colored cardstock it makes your ink blending easier because you don't have to ink blend so much.  By adding the whisper white in the center and blending outwards you create a glow in the center of the cardstock, as you can see above.  


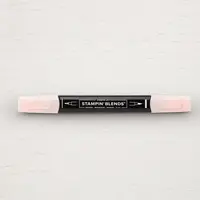
For the second card I stamped the background in Crumb Cake ink on my Crumb Cake base.  Once I had that done I added a piece of Whisper White cardstock to the stamparatus and stamped again using tuxedo black ink.  I then did a little fussy cutting for the rose.  I then took it and did a little quick coloring.  I swiped some color onto it with my Dark Petal Pink Stampin' Blend marker, and then used the textured stamp from Dressed to Impress Stamp set.  This allowed me to do some quick coloring without a lot of work.  


For my last card I stamped the background stamp on Whisper White in Petal Pink ink and cut it down to 3 1/2 x 5 1/2.  I matted it onto a piece of Lovely Lipstick cardstock and then onto a Purple Posy card base.  I added a piece of the Best Dressed Designer Series Paper matted with Lovely Lipstick to the front of the card to add a little color and texture.  I heat embossed the sentiment onto a little Lovely Lipstick piece.  

Stampin' Up! Shopping List:


Price: $49.00
Happy Stampin'
Rick Adkins 


Join my NEW Online Technique & Fancy Fold Club!  You can find out all the details by clicking here!

Last day to sign up for my Monthly Card Club by February 20, 2020!  Sign up and learn more about Card club by clicking here!  February's featured stamp set is the Morning Star Stamp Set.  Stamps sets are not included in the club but may be purchased using the host code as an add on.  Or you may use something you already own.  


Receive the January Creative Stampers Tutorial Bundle with any size order!  Features 17 projects designed by Stampin' Up! demonstrators from around the world.  This month we all featured a item in the Sale-a-bration Brochure.  

Template Designed by creativeworkerbee