Showing posts with label Watercoloring. Show all posts

Wednesday, May 26, 2021

United Through Creativity Sailing Away Card

 You are not a drop in the ocean.  You are the entire ocean in a drop.  I loved this quote by Rumi that was part of the United Through Creativity Digital Download and is the sentiment from the digital stamps that I picked for my card  today.  Hello and welcome to my blog; I am glad that you are here.  

Learn how to do simple watercoloring with the United Through Creativity download and Sailing Home Cling Stamp Set.

During my weekly Facebook Live last night I shared how to make this card and how to do some simple watercoloring with your ink pads.  I go live every week on Tuesday nights at 8:30 pm CST on my Facebook Business Page.  You can join me there each week for a live card making session.  

Friday, November 13, 2020

Just for you Watercolor Card - Warm & Toasty Stampin' Up!

 Hello and welcome to my blog; I am going to share with you the card that I am doing today during my YouTube Live today at 11 AM CST.  If you have never joined me for a YouTube Live I go live every Friday at 11 am.  Today I am going to share a super cute little watercolor card using the Warm & Toasty Stamp Set.  

Watercolor Card using the Warm & Toasty Stamp Set.  Set to learn more!

Tuesday, October 20, 2020

Warm & Toasty - Watercolor Card The Spot Challenge #133

 Hello and welcome to my blog; today I am going to share with you my card for this week's color challenge at the Spot.  I used the Warm & Toasty Stamp Set today and created a super cute little card using a watercolor background.  I used a negative painting technique to create the background for my card.  The only colors that I used for my card were the ones for the challenge.  Here's a look at my card.  

Check out my Warm & Toasty Watercolor Card for this week's Color Challenge at the Spot.  Rick Adkins Independent Stampin' Up! Demonstrator

Sunday, March 22, 2020

Forever Blossoms CASE the Catalog

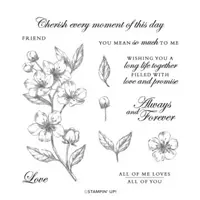
Hello and welcome to my blog; today I am going to share with you another CASE the Catalog Card.  Today we are going to use the Forever Blossoms Stamp Set and do a little watercoloring.  The greetings in the Forever Blossoms Stamp Set are designed for weddings, anniversaries, friendships, and more. Its detailed floral images can be used to make greeting cards for any occasion. This stamp set is also available in French. This is a Distinktive** stamp set; it has a special texture that gives added depth and dimension in a single step, creating photo-realistic images. **Patent pending

Here's a look at today's card.  

Tips & Tricks: 

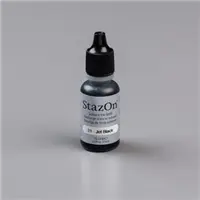
Casing means to Copy And Share Everything or to Copy And Selectively Edit.  Casing is a great way to learn something new or something you want to try, and the Stampin' Up! catalogs are not only a shopping list but a inspirational idea book; where you can find new techniques and card ideas to try.  I received today's card as part of a CASE the Catalog Swap I took part in.  So let's get into the card shall we.  The floral image from the Forever Blossoms Stamp Set was stamped in Stazon Ink on Shimmery White Cardstock.  This is a perfect base because you can do a little watercoloring on.  The Shimmery White Cardstock is smooth enough that you can get a very nice stamped impression but also strong enough to let you add a lot of water when watercoloring.  Which actually was not the case with this card, the amount of water I mean.  


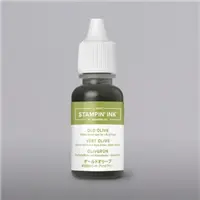
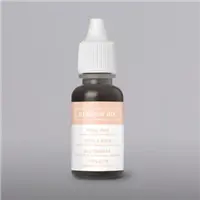
The stamped images were then watercolored with a little ink.  I usually use a few drops of a ink refill to watercolor with in a little white watercolor tray; which can be picked up at any box store in the craft section.  The Aqua painter is a perfect choice for adding the color.  Remember the more water you add the lighter the color.  It's better when watercoloring to add multiple lighter layers and build up the colors after each layer dry.  The colors used were Petal Pink and Old Olive.  Once dry this layer was added to a Pool Party Card Base cut at 5 1/2 x 8 1/2 (scored at 4 1/4).  The sentiment was then stamped on Whisper White Cardstock and then cut out using the Stitched Nested Label Dies.  There was also a couple of the stitched labels in the next size down from the Parisian Blossoms Speciality Designer Series Paper.  


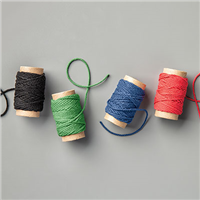
The stitched labels where then attached together.  You can take the one DSP label and cut in half to place behind the sentiment.  Then you can add some of the Poppy Parade Twine from the Country Club Twine Combo Pack in a couple loops and then the sentiment put on top with a few Stampin' Dimensionals.  That finishes the card.  I hope that you will give watercoloring with ink refills a try if you haven't before.  Thank you for dropping by today.  If you need any of the supplies that you have seen used today you can pick them up in my online store.  
Rick Adkins


Use the March Host Code on any order of $50 (before taxes & shipping) or more during the month and receive a gift from me in April as a Thank You.  If your order is $150 or more, please don't use the host code.  You will forfeit your Stampin' Rewards if you do; and I want you to get those rewards.


If you place any size order with me during the month of March, you will receive the March Creative Stampers Tutorial Bundle from me as a little thank you.  This month's tutorial bundle features fourteen floral themed tutorials.  The Creative Stampers Tutorial Bundle can either be earned for FREE with any size order or Can be purchased for $20 from me.

Stampin' Up! Shopping List: 


Thursday, November 21, 2019

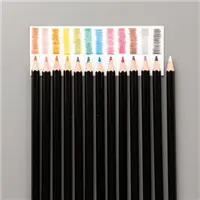
Hand Painted Holly Card with Watercolor Pencils Video Tutorial

Hello and welcome to my blog; today I am gong to share with you the card that I made last night during my Facebook Live.  This card is also for my 25 Days of Christmas Holiday Card Series 2019.  I created this card using our two sets of watercolor pencils and some watercolor paper.  Here's a look at the card I created.


You may think that creating your own watercolor painting is hard? Or that you have no talent to draw or paint.  I am here to tell you that you couldn't be any further from the truth.  Creating your own hand drawn and painted watercolor holly card is as simple as knowing what shapes to break your image down into and how much pressure to use on your pencils.  The viewer's eyes will read the image as you have intended it to be.  That is one of the reasons you can create images by hand look as you intended.  The biggest thing you have to remember as I mentioned above is breaking images you want to draw down into the basic shapes that comprise the image.  By breaking each berry and leaf down into different shapes you see helps to make the drawing process easier.  
The berries on my card are basic circular shapes.  So by drawing them this way and coloring them in with both real red and cherry cobbler watercolor pencils allows the eye to read them as holly berries.  Our mind knows that holly leaves have spikes on them so they have a pointed end, by drawing them with this pointed triangular end our eyes read them as the actual holly leaf shape.  Drawing is all about putting what shapes you see down on the paper.  But, by adding the colors that our mind knows that these images are helps the viewers mind to read the drawn and painted images as holly leaves and berries.  By adding in the colors that make up the green hue of the holly leaves (blues and yellows) you are creating a move living green hue that will help the eye read as lights and shadows all depending on where you place these colors helping the eyes and mind to read each stroke of the pencil and aqua painter as the actual holly leaf.  
Watercolor pencils are a great medium to achieve the look of not only watercolors but will allow you to break down the image you are trying to create without any hard lines of a graphite pencil.  Watercolor pencils are way more forgiving, once the pencil marks are activated with water the lead becomes pigment that will flow with the water on the paper.  Another tip with using watercolor pencils is the amount of pressure you place on the pencil to the paper.  The heavier you press on the pencil the more pigment you are putting down which means the more pigment you are placing on the paper.  Which also means the darker the color will appear.  If you want a lighter color chock back on the pencil so you have less pressure on it.  Then when you add your water you will have a lighter value of color, because you have less pigment that has been applied to the paper.  
By putting all these little tips together you can create any image that you would like.  Painting and drawing is all about breaking things down to basic shapes, knowing how much pigment to place on the paper, what colors to add together to create different hues and values, and remembering that when something is laying on top of another there is always a shadow and highlight.  These little rules if you remember them will change your painting forever.  

Video Tutorial: 


If you are viewing this post by email you my have to click here or on the image below to view the video.  Not all mail servers will play the embedded video.  
Thanks for dropping by today I hope that you have found my little tips and tricks helpful when you sit down to create your own watercolor painted holly card.  If you haven't tried watercolor pencils yet I would encourage you to do so.  They are a wonderful coloring media that can be used in so many different ways.  
Happy Stampin' 
Rick Adkins 

If you live in the US.  I would love you to choose me as your demonstrator.  If you would like to purchase any of these products you can click on the Shop Now Button or by clicking on any of the images below.  Alternatively, you can also contact me by email to place your order.  Please be sure to use the monthly host code and I’ll send a little something out to you the following month to say Thank You!  

November HOST CODE:  QU2TJBJN
  1. Spend any amount with me this month and receive the Creative Stampers Tutorial Bundle.  Plus get a gift from me in December.
Please remember that if you use the host code you cannot use that order towards my KCRP’s (Kinmon Crafty Reward Points) that would be double dipping and is not allowed.  For more information on KCRP’s click here.  

Three main reasons to Join!  
1.     You Get at least a 20% discount on all your orders while you are a demo.   
2.     You get to join my fun Kinsmon Crafters Team and Private Facebook Group.
3.     Access to directions to all my online classes 
I All Ready Know I Want to Join!  Sign Me UP!

Stampin' Up! Shopping List: 


Sunday, September 1, 2019

We'll Walrus Be Friends CASE the Catalog

Hello and welcome to my blog; today I am going to share with you a card that I CASEd from the 2019 Stampin' Up! Annual Catalog.  CASE means Copy and Share Everything or Copy and Selectively Edit.  Casing a design is a great way to learn new techniques, and skills as well.  Casing is also a great way to improve skills.  The card that I cased came from page 83.  Here's a look at my card.

This is the image I CASEd and was inspired by.
image by Stampin' Up! 


My Version: 

I tried to make my version of this card as close as I could.  I started out with a Smoky Slate card base.  The card base in the picture above is a side folding card 5 1/2 x 8 1/2.  I created mine as a top folding card 4 1/4 x 11 scored at 5 1/2.  
I then took a piece of Pool Party cut at 4 x 5 1/4 and used the High Seas 3D embossing folder and attached it to the card front.  I then used a piece of the Fluid 100 Watercolor paper and the Stitched Rectangle dies to cut out the image that will be placed on front.  I stamped all the images in Stazon Jet Black ink and let it dry.  Once it was dry I could watercolor the images.  I used a aqua painter and water colored the images using Smoky Slate, Balmy blue, Pool Party, Blueberry Bushel, Pumpkin Pie and Poppy Parade.  I just squeezed my ink pads to put ink in the top to use as a pallet.  Once I had everything colored and it had died I wrapped the Poppy Parade twine around and secured to the card front using dimensionals.  I then took about four inches or so of extra twine and tied a knot around the one that I wrapped I let a few inches hang down.  I added a knot on the other end and pulled the twine apart so it was just the threads hanging.  

I added a little of the stripped Washi tape from the Follow your art washi tape collection.  I stamped the sentiment in Basic Gray ink and created a little banner and added it to the card front with dimensionals.  I then added a piece of whisper white to the inside.  

Thanks for dropping by today, I hope that you have a wonderful day.  You can find a full list of all the supplies used in the Shopping List below.  
Happy Stampin' 
Rick 

Host Code and Free Gift:

 September HOST CODE:  VBBR3SCM
  1. Spend any amount with me this month and receive the Creative Stampers Tutorial Bundle featuring Fancy Fold or Interactive Projects.  Plus get a gift from me in October. 

Please remember that if you use the host code you can not use that order towards my KCRP’s (Kinmon Crafty Reward Points) that would be double dipping and is not allowed.  For more information on KCRP’s click here. 

Stampin' Up! Shopping List

Template Designed by creativeworkerbee