Showing posts with label Peaceful moments. Show all posts

Thursday, March 19, 2020

Peaceful Moments Lidded Poppy Box

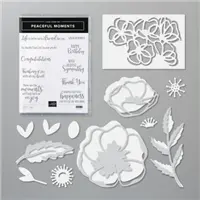
Hello ans welcome to my blog; today I am going to share with you my Lidded Poppy Box, that I made.  I used the Peaceful Moments Bundle for my flower and sentiment and created this super cute little box for you today.  The Peaceful Moments Bundle includes the Peaceful Moments Stamp Set and the Poppy Moments Dies.  Create fancy, layered die-cut poppies, leaves, and more to add beauty and depth to your handmade cards, scrapbooks, journals, and other paper crafts using the Poppy Moments Dies. Pair the dies with the coordinating Peaceful Moments Stamp Set to add heartfelt sentiments to your projects for birthdays, congratulations, sympathy, thank you, and more.  Here's a look at today's project.

Tips & Tricks: 

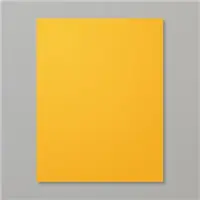
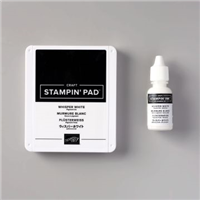
To created the multi colored flower on the top of my box I used the Peaceful Moment Dies and cut out all the pieces of cardstock.  I used scraps to create the flower.  As far as cardstock goes I used scraps of Daffodil Delight, Mango Melody, for the flower and Mossy Meadow and Old Olive for the leaves.  I did a little sponging of the colors onto the cardstock to create the different values.  I also added a little Whisper White Craft Ink for the highlights.  I used a sponge dauber to get into the areas and sponged on the ink.  Once all the inking was completed and dried I glued everything together with a little liquid glue.  


I then created my box top and base with a little cardstock and put them together with a little Tear & Tap.  The box was a basic box construction so nothing fancy there.  The base was created from a 8 x 8 piece of Daffodil Delight cardstock and the top was made from a 6 x 6 piece of Thick Whisper White Cardstock.  I wrapped a little of the Daffodil Delight Ruched Ribbon around the top and tied it into a pretty little knot so it would stay in place.  You can add a few mini glue dots under the ribbon if you don't want it to move at all.  


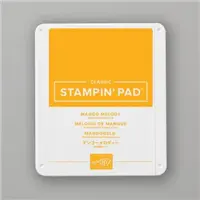
Once the box was completed I added the poppy with a few Stampin' Dimensionals.  I then created a double fish tail banner for my sentiment which comes from the Peaceful Moments Stamp Set in Mango Melody Ink.  Greetings, greetings, and more greetings. Whatever the situation, the Peaceful Moments Stamp Set has the words you need to express your thoughts.  I thought this made for a prefect little gift box for someone.  Thanks for dropping by today I hope that you have a wonderful day and stay safe.  If you need any of the supplies you can order them in my online store by clicking on the item below.  
Happy Stampin'
Rick Adkins


Use the March Host Code on any order of $50 (before taxes & shipping) or more during the month and receive a gift from me in April as a Thank You.  If your order is $150 or more, please don't use the host code.  You will forfeit your Stampin' Rewards if you do; and I want you to get those rewards.


If you place any size order with me during the month of March, you will receive the March Creative Stampers Tutorial Bundle from me as a little thank you.  This month's tutorial bundle features fourteen floral themed tutorials.  The Creative Stampers Tutorial Bundle can either be earned for FREE with any size order or Can be purchased for $20 from me.

Stampin' Up! Shopping List: 


Sunday, March 1, 2020

Painted Poppies CASE the Catalog

Hello and welcome to my blog; today I am going to share with you another Card for my CASE the Catalog Series.  Today's card was one that I received as part of a swap that I took part in back in November.  We were all assigned a different stamp set or bundle from the Sale-A-Bration Brochure or the January-June Mini Catalog to CASE.  As a reminder CASE means Copy And Share Everything or Copy and Selectively Edit.  This card was done by Elizabeth Mayfield-Hart of Spread Joy Stamping.  I have linked her blog so you can check out all the great projects Elizabeth comes up with.  Here's the card that Elizabeth picked to CASE from the Catalog.

Tips & Tricks: 

This is a varly easy card to reproduce and I would actually consider it to be more on the #simplestamping side of the crafting spectrum.  The card base is a piece of Calypso Coral Cardstock cut at 4 1/4 x 11 scored at 5 1/2 to make a side folding card base.  Next Elizabeth stamped the poppy image from the Painted Poppies Stamp Set.  She stamped it a couple of times along the bottom of the Poppy Parade layer (3 3/4 x 5 1/2).  This can be done two different ways.  One with just the stamp and a clear block.  Or, you can also do this by using the Stamparatus.  


I not sure if Elizabeth used Stazon or Tuxedo Black ink for the stamping, but I am willing to suggest that it's probably Stazon Jet Black ink.  I think that this is the ink that was used because of how dark black it is stamped.  Tuxedo Black is really just a dark dark charcoal gray color and not a true true black.  The sentiment came from the matching stamp set Peaceful Moments.  Both of these stamp sets work together beautifully.  The Painted Poppies is all about the imagery and so in contrast the Peaceful Moments is all sentiments that can go with the Painted Poppies set or with any set you would like.  
Thanks for dropping by today, I hope that you have a wonderful day and the finish of your weekend.  If you need any of the supplies you've seen today; you will find them all listed in the shopping list below.  
Happy Stampin' 
Rick Adkins 

Stampin' Up! Shopping List: 

 Use the March Host Code on any order of $50 (before taxes & shipping) or more during the month and receive a free gift from me in April as a Thank You.  If your order is $150 or more please don't use the host code.  You will forfeit your Stampin' Rewards if you do; and I want you to get those rewards.  


If you place any size order with me during the month of March you will receive the March Creative Stampers Tutorial Bundle from me as a little thank you.  This month's tutorial bundle features fourteen floral themed tutorials.  The Creative Stampers Tutorial Bundle can either be earned for FREE with any size order or Can be purchased for $20 from me.  


Friday, January 17, 2020

Life is Better With a Friend Like You

Hello and welcome to my blog; today I am going to share with you a card that I made using the die cut coloring hack I shared during this weeks Facebook Live.  If you missed that post and video you can click here to see it.  I used the Peaceful Moments Bundle to create my card for today's project.  The sentiment from today's card came from the Peaceful Moments Stamp Set.  Here's a look at the card I created.

This is a little more geared toward the casual or avid crafter with all the die cutting involved.  The technique is the same just a little more die cutting involved.  I started out by cutting everything out using the Poppy Moments Dies.  I started out by cutting the Poppy Parade piece of cardstock first.  I cut it first to 4 1/2" x 3 1/4" and then ran it through the die cutting machine twice with the more decorative die.  Once facing one way and then flipped it around and cut it again in the other direction.
For the poppies and leaves I used the following cardstocks; Poppy Parade, Very Vanilla, Daffodil Delight, Mango Melody, Shaded Spruce, and Pear Pizzazz.  I used the following ink to add the coloring for the die cuts.  I added a little Poppy Parade ink in the center of the Vanilla flower and added a little daffodil delight in the center.  I then added the craft white around the edges.  On the poppy parade flower I used poppy parade ink around the center and white around the edges.  For the buds I used Daffodil Delight at the base of the buds and white at the top just a little.  For the leaves I used Shaded Spruce on the dark part and came in and used a little white just around the edges.  I did the same what the Pear Pizzazz just but used the matching ink.  This allows for multiple tones and values on the same leaves and flowers. 
Once everything was cut colored and died I could put them together.  I glued everything together using Multipurpose liquid glue.  I popped the Poppy Parade die cut panel up on Stampin' Dimensionals in the center of a Pear Pizzazz card base (5 1/2 x 8 1/2 scored at 4 1/4).  I then arranged all the die cuts around the card popping some up with dimensionals and letting others flat on the die cut panel.  I stamped the sentiment in pear Pizzazz ink on a strip of Whisper White Cardstock cut at 5/8" x 4 1/4".  I tucked one end under the poppies just where the sentiment showed.
Thanks for dropping by I hope that you will give the die cut coloring hack a try.  If you need any of the supplies that I used today you can pick them up in my online store by clicking on the item in the product list below.
Happy Stampin' 
Rick Adkins 


Join my NEW Online Technique & Fancy Fold Club!  You can find out all the details by clicking here!

Receive the January Creative Stampers Tutorial Bundle with any size order!


Product List

Template Designed by creativeworkerbee