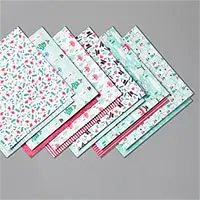
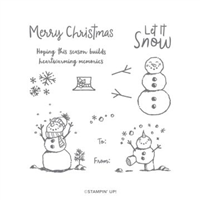
Hello and welcome to my blog; today I have four super cute projects to share with you today. If you are looking for stocking stuffer or quick little gifts for coworkers today's post is for you. I used some scraps of cardstock, designer series paper, and a few other items to create these cute little gift boxes. My projects today were CASEd and inspired from my friend Ronda Wade. You can find more pictures and details below.
Monday, December 13, 2021
Wednesday, November 10, 2021
Create a 3D Snowflake Ornament - Video Tutorial
Hello and welcome to my blog; today I am going to share the project that I made last night during my YouTube Live. During the Live I shared how to make a 3D Snowflake Christmas Ornament using one sheet of 6" x 6" designer series paper. You could make so many different types of these fun festive ornaments with all the designer series papers that we have between the 2021-2022 Annual Catalog and the July-December Mini Catalog.
Tuesday, December 3, 2019
Let it Snow Scandinavian Star Ornament Home Decor Piece Video Tutorial
Hello and welcome to my blog; today I am going to share with you a super cute home decor piece that's super easy to make and actually quick. One other thing that is great about this project is you can use up some of that Designer Series Paper you may have on hand or in your stash. I saw this on a video and in industry magazine recently and just had to try it. I have been making the smaller version of the Scandinavian Star Ornaments for one of our Christmas Trees. We have a few different trees that we put up every year, you can see past Christmas Open House photos by doing a search in the search bar. If not I will try to come back and try to link it from a couple years ago. We decided this year to create a tree with handmade ornaments, so I am super excited to see it completed. Anyway here's a look at my home decor piece.
Tips & Tricks:
Video Tutorial:
Stampin' Up! Shopping List:
BLOG ARCHIVES
-
►
2021
(222)
- December (16)
- November (17)
- October (21)
- September (23)
- August (13)
- July (18)
- June (26)
- May (26)
- April (15)
- March (6)
- February (19)
- January (22)
-
►
2020
(303)
- December (18)
- November (27)
- October (22)
- September (16)
- August (30)
- July (24)
- June (14)
- May (30)
- April (28)
- March (33)
- February (29)
- January (32)
-
►
2019
(318)
- December (23)
- November (31)
- October (37)
- September (26)
- August (28)
- July (28)
- June (32)
- May (20)
- April (28)
- March (34)
- February (26)
- January (5)

