Thursday, December 2, 2021
Friday, November 5, 2021
Thursday, October 21, 2021
No Sew Gnome Mini Jam Jar Cover - 3D Thursday Free Tutorial
Hello and welcome to my blog! I hope that you are doing well today and I am glad that you are visiting with me. Darla Watson is our team designer this week. Darla created this super cute little project to dress up the Mini Jam Jars and make them very festive! Check out her a wonderful project below.
Thursday, December 19, 2019
Toile Tidings Large Chocolate Truffle Box
Hello and welcome to my blog; today I am going to share with you the Large Chocolate Truffle Box that I made during last nights Facebook Live. I do a Facebook Live each Wednesday at 8 pm CST on my Facebook Business Page. This is a large box that's holds a half a bag of Lintz or Moser Roth Truffles. This box measures 7" x 2" x 2", so you can see it's a great size for gift giving. For my project today I used the Toile Tidings Designer Series Paper to decorate my box. Here's a look at my project.
As I mentioned I used the Toile Tidings Designer Series Paper to decorate my box today. The base of the box was made with cardstock. I used either Real Red or Garden Green for the base and then the other color for the mats for the designer series paper. I used the same color of the box base for the designer series paper. With the Toile Tidings it was super easy to pick which color to use. There are only three colors in the designer series paper; Very Vanilla, Real Red, and Garden Green. The same pattern is on each side of the paper but in either Very Vanilla and Real Red or Very Vanilla and Garden Green so it makes creating super easy.
The Real Red version was the first one that I made for my Facebook Live. I used the 1" Real Red Ruched Ribbon to tie the box close. This box uses one full sheet of 8 1/2 x 11 cardstock to make the base. I scored the base cardstock on the short side at (on the 8 1/2" side) at 2, 4, 6, and 8. On the long side (11" side) I scored at 2" and 9".
The box was decorated with three pieces of cardstock (cut at 6 3/4 x 1 3/4) for the front, top, and back. The two side mats were cut at 1 3/4 x 1 3/4. The Designer Series Paper for the box was cut at 6 1/2 x 1 1/2" (you need three) and 1 1/2 x 1 1/2 (you need two). To add a little more decoration I used ribbon to secure it close. I used the Garden Green Double Stitched Ribbon and the Very Vanilla & Copper Classic Weave Ribbon on the Garden Green Box.
Video Tutorial:
Sizes & Dimensions:
- Real Red or Garden Green Cardstock (Base) - 8 1/2 x 11
- Real Red or Garden Green Cardstock (Mats) - (2) 1 3/4 x 1 1 3/4, (3) 6 3/4 x 1 3/4
- Designer Series Paper - (2) 1 1/2 x 1 1/2 (3) 6 1/2 x 1 1/2"
- Spend any amount with me this month and receive the
Creative Stampers Tutorial Bundle. Plus get a gift from me in January.
Stampin' Up! Shopping List
Friday, November 1, 2019
Blogging Friends November Blog Hop: Celebrate with Some Christmas Cheer
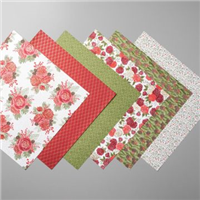
Hello and welcome to my blog today, and the November Blogging Friends Blog Hop! This month our theme is Celebrate with Some Christmas Cheer. When I came up with this month's theme I had something different in mind than what I came up with for this month's project. I didn't know at the time I came up with the theme that Stampin' Up! would be releasing a limited time suite that was just perfect for this theme. But, they says things happen for a reason and this was so true with this theme and the limited time Christmastime is Here Suite of products that went live in my online store today. Here's a look at my projects.
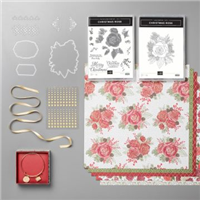
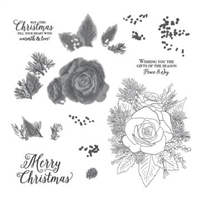
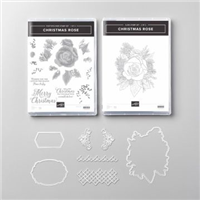
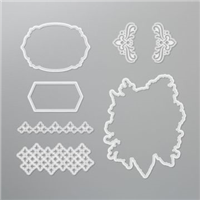
The Christmas Rose Stamp set is a dual configuration set; meaning one stamp set is clear mount red rubber and the other is Photopolymer. The Red rubber cling stamp is the outline of the rose bouquet. The photopolymer set is the layering set to fill in your outlined images. This set works best with the stamparatus, so that you can get perfect placement with your stamped layers. I used a piece of the designer series paper in the background of my card.
Next for the gift set I made a bow using the designer series paper. I used the bow to decorate my little gift bag. I also created a matching tag to go along with the bow and gift bag. I love the look of brown paper mixed with pretty paper at Christmas Time. I did a video on how to create paper bows a few weeks ago I will share that with you as well so that you can make your own.
Paper Bow Video:
Blog Roll:
Stampin' Up! Shopping List:
Wednesday, October 30, 2019
New Stampin' Up! Paper Trimmer
Hello and welcome back to my blog today; Papercrafting begins with a beautiful first cut, which means having the right tool for the job is kind of a big deal. Well, do I have the tool for you! Get your hands on the new Paper Trimmer. I wanted to take a little time and talk to you about the new Stampin' Up! Trimmer that will be available starting November 1, 2019. Yes, it will be available in time to wrap and put under the Christmas Tree. I have been playing with this new trimmer all month long (one of the perks of being a demonstrator); and I am loving it. I have used the blade that came with it all month long and haven't had to change it one time. And, believe me I cut a lot of cardstock, glimmer paper, and window sheets with it over the last month. I've tried my best to give it a good work out before I would even share any real information with you. I know if you have followed me you have seen it used in my Facebook Lives, and other videos. But, like I said I haven't really talked about it because I wanted to give it a good once over before I did. Here's a look at the trimmer a little closer up.
 |
| image by Stampin' Up! |
Product Details:
- 15-3/8 x 8 x 1/2” (39 x 20.3 x 1.3 cm)
- Includes 1 cutting blade and 1 scoring blade.
- Includes imperial and metric measurements.
- Ruler and grid protected by durable plastic cover.
- Point on cutting handle for precise measuring.
- Right-side grid for cutting thin strips.
 |
| image by Stampin' Up! |
 |
| image by Stampin' Up! |
Thanks for dropping by I will see you again in the morning for a fun Halloween post.
BLOG ARCHIVES
-
►
2021
(222)
- December (16)
- November (17)
- October (21)
- September (23)
- August (13)
- July (18)
- June (26)
- May (26)
- April (15)
- March (6)
- February (19)
- January (22)
-
►
2020
(303)
- December (18)
- November (27)
- October (22)
- September (16)
- August (30)
- July (24)
- June (14)
- May (30)
- April (28)
- March (33)
- February (29)
- January (32)
-
►
2019
(318)
- December (23)
- November (31)
- October (37)
- September (26)
- August (28)
- July (28)
- June (32)
- May (20)
- April (28)
- March (34)
- February (26)
- January (5)


