Showing posts with label 2019-2021 In Colors. Show all posts

Saturday, March 21, 2020

Botanical Prints Product Medley - Saturday Simple Stamping

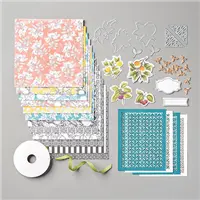
Hello and welcome to my blog; today I am going to share a Simple Stamping card with you using products from the Botanical Prints Products Medley plus a few additional supplies.  Creativity comes easy when you've got amazing coordinating products. Stampin' Up! doesn't want to brag, but coordination is one of their strong points. The Botanical Prints Product Medley is a perfect example. The medley includes stamps, paper, dies, and accessories for creating cards and more.  With everything included in this product medley it's perfect to make Simple Stamping Cards with when you are just starting out.  Because a majority of what you need plus more is right in the box.  Here's a look at my Saturday Simple Stamping card for this week.

Tips & Tricks: 

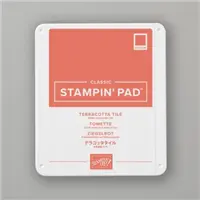
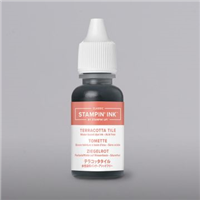
Since simple stamping is all about stamps, ink, and paper I found the products in the Botanical Prints Product Medley perfect to create some #simplestamping cards.  I cut a piece of the Botanical Prints Designer Series Paper down and added a matching mat layer behind my designer series paper to enhance the mix of black and white imagery with the bold beautiful colors on the paper.  I added my layer to a piece of Thick Whisper White cardstock that I cut down to 4 x 5 1/4.  I simple stamped friend in Terracotta Tile Classic Ink at the bottom of this layer and added it to a Thick Whisper White Base that I cut to 5 1/2 x 8 1/2.  


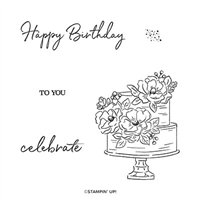
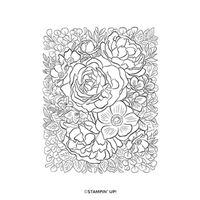
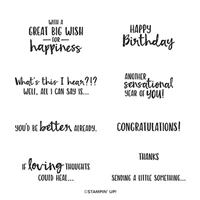
For the inside of the card I stamped the Happy Birthday sentiment from the Happy Birthday to You Stamp Set (which is a Saleabration set this year and can be earned for Free with a qualifying order).  I added a couple of the matching floral images from the Botanical Prints Stamp Set on the inside of the card to tie it in.  I keep the color pallet simple and only used the one color ink.  When you are a beginner this makes your card making so easy because you don't have to hunt for matching ink colors or colors that coordinate.   But if you have followed me for anytime at all you know that I firmly believe as long as you pull your colors from a pack of designer series paper they will match because Stampin' Up! has done all the coordinating work for us.  So, you can rest assured that the colors you pick from the designer series paper will be a perfect match on your card or project.  


To create a perfect matching envelope I stamped the same botanical print in Terracotta Tile Classic Ink on the flap of the envelope.  This creates the perfect coordinating envelope and gives the person on the receiving end a little hint at what's inside.  If you need any of the products you have seen today you can order them in my online store by clicking on the items in the shopping list below.  Thank you for stamping bye don't forget to follow my blog for daily inspiration.  
Happy Stampin' 
Rick Adkins 


Use the March Host Code on any order of $50 (before taxes & shipping) or more during the month and receive a gift from me in April as a Thank You.  If your order is $150 or more, please don't use the host code.  You will forfeit your Stampin' Rewards if you do; and I want you to get those rewards.


If you place any size order with me during the month of March, you will receive the March Creative Stampers Tutorial Bundle from me as a little thank you.  This month's tutorial bundle features fourteen floral themed tutorials.  The Creative Stampers Tutorial Bundle can either be earned for FREE with any size order or Can be purchased for $20 from me.

Stampin' Up! Shopping List: 


Friday, February 21, 2020

Breathtaking Bouquet Spotlight Coloring

Hello and welcome to my blog; today I am going to share with you another card using the beautiful background stamp Breathtaking Bouquet.  I shared three cards yesterday using this same stamp set.  If you missed that post you can check it out by clicking here.  Today's card is using the Spotlight coloring technique this is a super fun and easy technique that allows you to spotlight a certain area of a stamped image.  Or you can use it to add interest to your card.  I used it to do both, and here's a look at today's project.  

Tips & Tricks: 

Use the Breathtaking Bouquet Background Stamp to create beautiful floral backgrounds you can use all year long for card making and other paper projects. This background image is ideal for coloring techniques.  To create today's card I started out by stamping the background image onto the So Saffron cardbase in matching So Saffron Ink.  Once I had that done I then stamped it again onto a piece a whisper white cardstock in Tuxedo Black ink.  After stamping it the second time it was time to start some Stampin' Blends Coloring.  


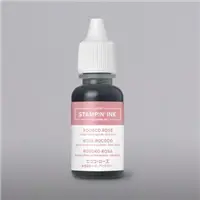
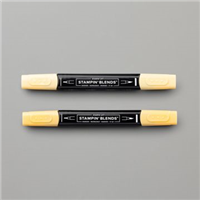
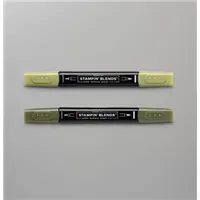
I colored all the flowers using the following Blends;  So Saffron, Daffodil Delight, Seaside Spray, Rococo Rose and Mossy Meadow for the leaves.  I used both the light and dark of each color to color most of the flowers, using the dark to light coloring technique.  Meaning I started with the darkest color in the shadow areas and then blended them out with the lighter colors.  I did this for all of them but the rose.  For the rose I started out with Daffodil Delight light in the dark areas and then used the So Saffron dark over that before blending it out with the light So Saffron blends.   For the leaves I added the dark in the shadow areas that are overlapped by the flowers, and along the center of the leaves.  I then colored over them with the light Mossy Meadow.  

Once all the coloring was done I used my paper snips and cut out the flowers that I had colored.  I added it to the card base by attaching it with dimensionals.  I then stamped my sentiment from Sending you Thoughts Stamp Set (which can be earned with a $50 order during Saleabration for Free).  I then popped it up over the bouquet also using dimensionals to give it a nice lift.  I finished off the card by adding a little bling with the Basic Rhinestone Jewels.   Thanks for dropping by I hope that you are inspired to give spotlight coloring a try.  If you need any of the products that I used today you can pick them up in my online store by clicking on the shopping list below.  

Stampin' Up! Shopping List: 


Happy Stampin'
Rick Adkins 


Join my NEW Online Technique & Fancy Fold Club!  You can find out all the details by clicking here!

Last day to sign up for my Monthly Card Club by February 20, 2020!  Sign up and learn more about Card club by clicking here!  February's featured stamp set is the Morning Star Stamp Set.  Stamps sets are not included in the club but may be purchased using the host code as an add on.  Or you may use something you already own.  


Receive the January Creative Stampers Tutorial Bundle with any size order!  Features 17 projects designed by Stampin' Up! demonstrators from around the world.  This month we all featured a item in the Sale-a-bration Brochure.  

Wednesday, February 19, 2020

Sending Flowers Little Ladybug - Hey Lady Card for #PCC371

Hello and welcome to my blog; today I am going to share with you may card that I designed based off of this week's Paper Craft Crew Sketch Challenge.  I decided to use the Sending Flowers Dies which are part of the Coordinating Product Release (while supplies last of until March 31, 2020) and the Little Ladybug Saleabration Host Stamp Set.  I used the two to create a super cute window card that I just love.  Here's a look at my card.  

Sending Flowers Dies, Little Lady bug stamp set, die cut window card, Stampin' Up!, Rick Adkins Independent Stampin' Up! Demonstrator

Here's a look at the sketch that inspired today's card.

Tips & Tricks:

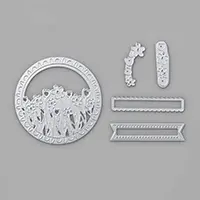
I made my card by die cutting the large floral circle die cut from the center of a piece of Mossy Meadow Cardstock to make the card base (4 1/4 x 11 scored at 5 1/2).  Once the center of the card was cut out I needed to die cut all the flowers in from the different colors.  I cut them multiple times from Purple Posy, Calypso Color, Flirty Flamingo, and So Saffron Cardstocks.  This is a great way to use up some scraps, which is what I did.  I actually cut a few more than I needed.  I then attached each of the colored flowers to each flower.  I added each alternating the colors with a little Multipurpose Liquid Glue.  Before gluing all the flowers down I placed my Silicone Craft Mat underneath the card front.  The silicon craft mat is a must have item since snail, Multipurpose Liquid Glue, tear & tape, and hot glue will not stick to it.  

Sending Flowers dies, Little Ladybug Stamp Set, Stampin' Blends, Window Card, Stampin' Up!, Rick Adkins Independent Stampin' Up! Demonstrator

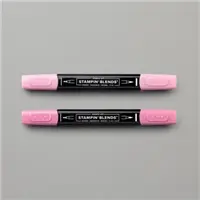
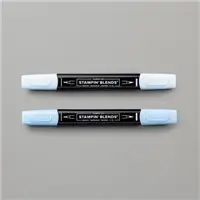
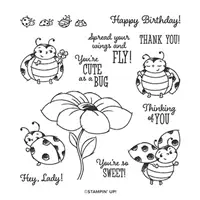
Once I had all the flowers covered, I then stamped three of the ladybugs from the Little Ladybug Saleabration Host Stamp Set in Memento Tuxedo Black Ink.  Once the ink dried I colored each of them with my Stampin' Blends in the following colors; Flirty Flamingo & Petal Pink, Purple Posy & Gray Granite, Calypso Coral & Petal Pink Combo Packs.  The first color listed is the colors of the wings and the second color is the face and belly color.  Once they were colored I used the Ladybugs Dies (also part of the Coordinating Product Release) to cut them out.  Once I had them cut out I cut out two of the grass clumps from a scrap of Mossy Meadow Cardstock.  I then stamped a sentiment on a scrap of Whisper White Cardstock in Purple Posy Ink (Discontinued).  But, you could use the Purple Posy Stampin' Write Marker from the 2019-2020 In Color Stampin' Write Markers.  

Sending Flowers Dies, Little Ladybug Stamp Set, Ladybugs Dies, Stampin' Up!, Rick Adkins Independent Stampin' Up! Demonstrator

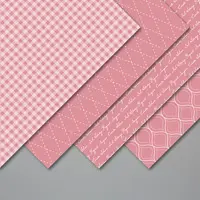
I pulled up all the little flaps that the floral die made on the outside of the circle.  I then added a piece of the 2019-2021 In Colors Designer Series Paper (in Seaside Spray) behind the floral die cut with liquid glue.  I then added the flirty flamingo ladybug tucked into the top left corner secured with a little liquid glue.  I added one of the tulip die cut to her flower with a Mini Stampin' Dimensional.  I then added the Purple Posy ladybug at the top with a Stampin' Dimensional.  I then used the scalloped banner die from the Sending Flowers Dies and cut out the sentiment.  I added it to the card with a Dimensional and a little liquid glue.  I then popped the other ladybug on the card over the end of the sentiment strip with a dimensional.  The grass was added the same way.  I did take a little mossy meadow ink and did a little ink blending up to the grass clumps to have a little bit of a contrast.  


Thanks for dropping by today, I hope that you like this super cute little card and that you will play along with us this week.  You can click on the sketch image at the top and see what the other design team members came up with.  If you need any of the supplies I used today you can pick them up in my online store.  You will find everything that I used listed in the Stampin' Up! Shopping List below.  

Stampin' Up! Shopping List: 


Happy Stampin'
Rick Adkins 


Join my NEW Online Technique & Fancy Fold Club!  You can find out all the details by clicking here!

Last day to sign up for my Monthly Card Club by February 20, 2020!  Sign up and learn more about Card club by clicking here!  February's featured stamp set is the Morning Star Stamp Set.  Stamps sets are not included in the club but may be purchased using the host code as an add on.  Or you may use something you already own.  


Receive the January Creative Stampers Tutorial Bundle with any size order!  Features 17 projects designed by Stampin' Up! demonstrators from around the world.  This month we all featured a item in the Sale-a-bration Brochure.  

Template Designed by creativeworkerbee