Hello and welcome to my blog; today I am going to share the project that I made last night during my YouTube Live. During the Live I shared how to make a 3D Snowflake Christmas Ornament using one sheet of 6" x 6" designer series paper. You could make so many different types of these fun festive ornaments with all the designer series papers that we have between the 2021-2022 Annual Catalog and the July-December Mini Catalog.
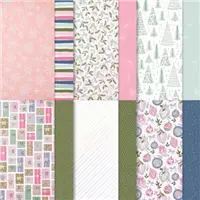
This is a super easy project to create for the Holidays as you will see in the replay of last nights YouTube Live. Which you will find below in this post. All you need is one 6" x 6" piece of Designer Series Paper: I used the Whimsy & Wonder Specialty Designer Series Paper on this project.
Whimsy & Wonder Specialty Designer Series Paper:
Conventional patterns meet an unconventional color scheme in the Whimsy & Wonder Specialty Designer Series Paper. This paper is a lovely choice for those who want to celebrate the spirit of the season. Images include gifts, trees, snowflakes, and more. And once the holidays are done, use the versatile stripes and tone-on-tone patterns for all of your projects. This papercrafting staple is great scrapbook paper, card making paper, and more! In this pack of Designer Series Paper you get 12 sheets of patterned paper: 2 each of 6 double-sided designs. The paper is 12" x 12" (30.5 x 30.5 cm) and is both Acid free & Lignin free. The coordinating colors in this pack of DSP are as followed: Blushing Bride, Crumb Cake, Iridescent, Mint Macaron, Misty Moonlight, Mossy Meadow, Polished Pink
 |
| Image by Stampin' Up! |
You are going to cut the entire piece of 6" x 6" DSP into 1/2" x 6" strips. After that it's just a matter of folding four pieces in half to find the center of each and attaching them as shown in the video. So that you can start the weaving and fun part of this project.
Video Tutorial:
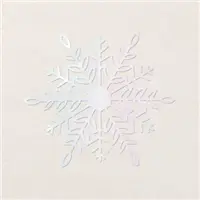
To the center of the snowflake ornament I added one of the Wonderful Snowflakes. These a fun little embellishment to work with. You get 24 in a pack and each one of the laser die cut snowflakes come on a sheet and all you have to do is pop one out to use on your project. Each one has a white side and an iridescent side. So, you can pick the side that's just right for your project. Plus they are super easy to attach to any project with Multipurpose Liquid Glue (which is what I used today), Mini Glue Dots, or Stampin' Dimensionals.
My Eden's Garden Ordering Special:
Join my Team:
Join the Kinsmon Crafters Today!
November Monthly Card Class:
Join me for the November Crafty Corner Monthly Online Card Club/Class. You can join the card club as a member for $39.00 a month and get all the perks of being a member or take the class for only $44.00 a month with no commitment. Click here to find out all the details and to register by November 20th to get this month's kit.
Rick's Kit & Paper Pumpkin Night:
How to attend
- Purchase your kits from the New Kits Collection using this months Host Code TYAP49VX by the 15th of November (this will give you two weeks for your kits to ship to your house before the night of fun)
- Or be one of my Paper Pumpkin Subscribers to be invited to the event. Remember that You have to be subscribed to Paper Pumpkin by the 10th of the month to get this months kit.


0 Comments:
Post a Comment
Thanks for taking the time to leave a comment.
Much Love,
Rick