Hello and welcome to my blog; today I am going to share with you the cards that I made last night during my weekly Facebook Live. Last night I made 11 cards using two sheets of 6" x 12" pieces, some matching cardstock, a little ribbon and a few more supplies. Here's a look at the cards I made.
Double Wonder Cards:
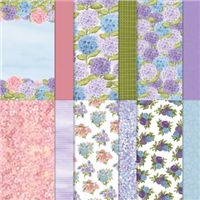
Double Wonders cards are a great way to use up some of your supplies and puts a different twist on the traditional One Sheet Wonders. With the Double Wonder Cards you make eleven cards from two sheets of 6" x 12" pieces of coordinating designer series paper. I picked two sheets of the Hydrangea Hill Designer Series Paper to do my cards with last night during my weekly Facebook Live. I then picked my coordinating cardstock to make my card bases and layering pieces along with my accessories.
1st Group of Cards:
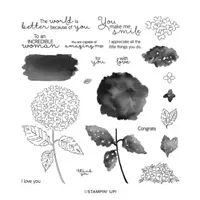
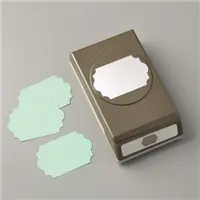
For the first cut for the Double Wonder Cards you take both pieces of your designer series paper and place them in the Paper Trimmer, making sure that if you have any pattern paper that is directional you have it facing the right way, and you are going to cut it at 4 1/2" x 6". From those two piece of designer series paper you are going to cut them to 1 1/2" x 3". You will also need four pieces of matching cardstock for your layering mats that are 3 1/4" x 5". I used the Everyday Label Punch and the same stamp from the Hydrangea Haven Stamp Set for all the sentiments on my cards today.
2nd Group of Cards:
For the second set of four cards you will need four card bases, for stamped and punched sentiments and some accessories. You are going to cut your remaining pieces of Hydrangea Hill Designer Series Paper to 4" x 5 1/4". So, cut both pieces at 4" x 6" then turn it and cut at 5 1/4". From that you are going to cut these pieces down again to 1" x 5 1/4" strips. You will add one additional score line to each of your card bases at 1 1/4" and add your designer series paper.
3rd Set of Cards:
For the third set of cards you are going to need two card bases, and two punched sentiments. Take the remaining 3" x 6" piece of designer series paper and cut them to 3 1/2" x 2 1/4". Add these to the card fronts along with the 4" x 3/4" pieces left over from the pervious set of cards.
Last Card:
For the last card your are going to take the last card base and last sentiment you have along with the left over designer series paper. With the designer series paper you are going to cut it in half at 1 3/4" to make four pieces. Attach the four rectangles to the card base and add the sentiment.
Video Tutorial:
If you are viewing this post by email you may have to click here to view the video.
Cutting Template:
Here's a image of the cutting template for the Double Wonder Cards.
Thanks for dropping by today I hope that you have a wonderful week and that you will give the Double Wonder Card technique a try. If you are not on my email list make sure you sign up today to get the latest updates on my classes and events. If you need any of the supplies that you have seen today you can pick them up in my online store by clicking on the item in the Stampin' Up! Shopping List below. When you are shopping make sure that you see my name and in the topper upper left hand side of your screen in the store. If not go to your account and make sure to pick me as the demonstrator you are shopping with.
Happy Stampin'
Rick Adkins
Get the May 2021 Creative Stampers Tutorial Bundle Free with any size order in my online store or it can be purchased for $22 in my Tutorial Store. The May Creative Stampers Tutorial Bundle features 11 masculine themed projects.
Sign ups are open for my 2021-2023 In Color Club now. This is a great way to get all the NEW In Colors in a budget friendly way over the next five months. Plus you will get a card kit each month with four projects featuring that month's In Color along with a monthly class showing how to put the cards together. Sign ups end on May 10th 2021. Click here to register!
Round 2 of Coffee & a Card information will be coming out soon!
For my May Crafty Corner Monthly Card Club I am using the Party Puffins Stamp Set for this sweet class. If you are not a Crafty Corner Monthly Club Member no problem you can still take the class. I offer this class to both Club Members and Non-Club Members. You can find out all the details about the club/class by clicking here. The deadline for this class is May 20, 2021.
I am so excited to be bringing you my latest online class preorder for the Hydrangea Haven Bundle! This bundle has been one of my favorites since it came out back in January. I know that you are going to love this class. Sign Ups are open from Sunday, May 16th – Tuesday, May 25th or until the class fills. Click here to find out all the class details or to sign up.









0 Comments:
Post a Comment
Thanks for taking the time to leave a comment.
Much Love,
Rick