Tuesday, December 31, 2019

Paper Pumpkin December 2019 Alternative Projects

Hello and welcome to my blog; today I am going to share with you a couple alternative projects for the December Paper Pumpkin kit Something for Everything.  Each month I love to create a few alternative projects to stretch the contents of my Paper Pumpkin kits.  By creating alternative projects you can not only stretch your kits to make more projects and more cards using some additional cardstock and other supplies along with creating sometimes even doubling the contents of the kits.  Here's a look at two alternatives that I came up with so far.


This month I used almost everything from this month's kit to create these two alternatives with the addition of two pieces of cardstock.  I used a piece of Terracotta Tile and Crushed Curry Cardstock to create these two cards.  Since you get two card bases from one sheet of cardstock I could have easily created two cards of the same design.  I used one of the card bases from the December kit on my cards today.  Well, two and a 2 1/4 of the cards in the kit.
For my first alternative card I cut a piece of Crushed Curry Cardstock in half at 4 1/4 x 11".  I then cut the Green striped card base from the kit down.  I started by cutting the front apart and cut the card front down to 2" x 4" and the back green piece of the card base down to 4 1/4 x 2 1/4".  I then layered the two pieces together.  I used the little flower image from this months stamp set all around the bottom of the card base in Crushed Curry Ink.  I stamped in both 1st and 2nd generation stamping.  I wrapped some whisper white baker's twine around my card base and tied a bow.  I then added the crushed curry polka dot hexagon sticker from the kit on to the front of the card base.  I added one of the gold foil stickers to the center of the hexagon, and stamped my sentiment on one of the banners.  I popped the banner up on Stampin' dimensionals.  I finished off this card by adding a Whisper White inside (4 x 5 1/4) and a few of the rhinestones that came in the December Kit.
For my second card I used a Terracotta Tile card base cut at 5 1/2 x 8 1/2 and layered the remaining striped card base to the front.  I then took one of the flowery card bases and cut a tag using the tag die from the Bonanza Dies (new in the January - June Mini Catalog).  I added the gold foil swirl onto the tag and then stamped the sentiment onto one of the banners and added it to the card front.  I added some of the flower stickers to the card front along with some of the leaves.  I added a couple of the small flowers to the card front and placed a few rhinestones to the center of them.  I added a 4 x 5 1/4 piece of whisper white to the inside of the card.

Video Tutorial: 

 If you are viewing this post by email you may have to click here or the image below to view the video.  Some mail servers will not play the embedded video.

Thanks for dropping by today; I hope that you have enjoyed my alternative projects for today.  Make sure to join me on Thursday I have two more alternative projects for you for this months A Paper Pumpkin Thing Blog Hop.
Happy Stampin' 
Rick Adkins 
Independent Stampin' Up! Demonstrator 


Product List:

Bonanza Dies
[151566]
$26.00

Monday, December 30, 2019

December 2019 Paper Pumpkin Something for Everything

 Hello and welcome to my blog; today I am going to share with you this month's Paper Pumpkin.  I got mine last week and started putting it together over the weekend.  Paper Pumpkin is our monthly subscription craft kit that is delivered to your mail box.  Each month everything in the box is different as well as the projects.  Some months you may make cards, and some maybe a dimensional project.  Each month is a surprise in a box delivered to your door.  Paper Pumpkin contains everything you need to create each project and there's always directions, and a little video provided by Stampin' Up!.  This months kit contained 12 cards (4 each of 3 designs) and here are the cards as they were intended (well somewhat).

What's inside the box:  

Each month each box has different projects and different components all ready to put together.  Inside each box along with the supplies for the projects you get a  exclusive stamp set and a new ink spot. The ink spot is just a smaller version of our larger ink pads.  I love to use them to travel and to use with my Stamparatus.  
Here's a look at the supplies that came in this month's kit.  Along with the card bases and matching envelopes we got four sheets of die cut stickers that we used to embellish one of the card designs.  There were three sheets of gold foil die cut stickers that also embellished the cards.  Also in this months kit was a set of die cut banners to stamp all our sentiments on.  
That was all the items to make the cards besides a little pack of champagne rhinestones, stampin' dimensionals, and this month's stamp set.  
This month's stamp set features a ton of sentiments.  This stamp set has so many sentiments that you should be able to find the perfect one for the perfect card.  Also in the stamp set is a small flower image with three little flowers, perfect to embellish up your cards.  
The final item in this month's kit as I mentioned was the ink spot.  Each month we get at least one in a coordinating color.  Some times we may get a couple of ink spots in coordinating colors.  This month's color came in a new 2019-2021 In Color.   Which was very exciting, and it was one of my favorite colors.  So I am sure you are wondering what color was in the box; well it was Terracotta Tile.  A great warm dark coral color perfect for so many project.  

This Month's Cards: 

As I mentioned above this month's Paper Pumpkin kit (Something for Everything) made twelve cards (four each of three designs).  One of the great things about Paper Pumpkin is that I can sit down and put the kits together anywhere and they don't take very long at all.   This was the first card that I made with this month's kit.  
I love this background paper on all the cards, but this one was one of my favorites.  I love the gold foil accents and the mix of patterns.  
The next card in this months kit features the die cut stickers and the gold foil die cut swirl.  This was probably one of the simplest cards to put together.   I stamped a simple thank you on one of the banners and added a few of the rhinestones to finish off the card.  
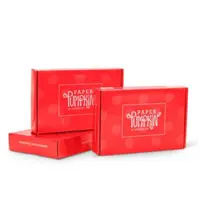
The last card in this month's card kit came out a little different than intended.  I was supposed to have put the main focal point of the card in the bottom right of the card but silly me had the card upside down when I created it.  So it ended up being on the top left corner instead.  I used one the hexagon sticker and the small gold foil leaves.  I stamped the banner with Happy Birthday to make it a super simple birthday card.  To finish off the card I added a few of the rhinestones in the kit.  
So are you wondering how you can get started creating using Paper Pumpkin!  It's super simple you can subscribe for a monthly subscription, or you can purchase prepaid subscriptions for 1, 3, 6, or 12 month's.  To get kit for a certain month you have to subscribe by the 10th of each month.  So are you wondering whats the benefits to each way.  

Month to Month: 


A month to month subscription (which is what I do) has a few benefits.  A few of the benefits to this type of subscription are convenience, and you can cancel or suspend your subscription at any time.  A month to month subscription costs $22 a month plus tax.  Which is billed monthly.  

Subscribe to a Monthly Subscription

Prepaid Subscription: 


Benefits to doing a prepaid subscription is you get to enjoy savings with a 6 or 12 month subscription.  You would qualify with the 6 and 12 month subscription for Stampin' Rewards.  During Saleabration you also can qualify for Saleabration items as well.  Another benefit to a prepaid subscription is they make a perfect gift.  You can purchase the subscription and give it to that crafty friend, family member or coworker and they can use the prepaid code to redeem when they want.  


When you subscribe to either plan you also get exclusive access to be able to purchase past kits (while supplies last)  This is something that only a Paper Pumpkin Subscriber can do. 

If you would like to extend the cards in your kit I will be sharing with you a few alternative projects with you this week on my blog and YouTube Channel.  So make sure you are on the watch out for them.  I will also be part of the A Paper Pumpkin Thing Blog Hop on Thursday when you will see more alternative projects from a very talented group of Demonstrators. 
Happy Stampin' 
Rick Adkins 
Independent Stampin' Up! Demonstrator 

Sunday, December 29, 2019

Lovely Lilly Pad - Sale-a-bration Sunday

Hello and welcome to my blog; today I am going to share with you a card I made featuring the Lovely Lilly Pad stamp set, matching dies and a little bit of the matching designer series paper.  All of which are part of this years Sale-a-bration offerings.  This year Sale-a-bration starts on January 3, 2020 and there are a lot of great FREE items that you can earn starting right off the bat.  I wanted to take a little time today and showcase some of those items along with some items you can order to qualify for some freebies.  Here's a look at my card.


I picked my colors for my card from the Lilly Impressions Designer Series Paper: Impressionistic images in rich colors make the Lily Impressions Designer Series Paper an excellent choice for elegant backgrounds and accents on handmade cards and scrapbook pages. I used the following colors for my card; Lovely Lipstick, Gorgeous Grape, and Granny Apple Green as the main colors for my card.
Stamp beautiful water lilies, lily pads, and more with the Lovely Lily Pad Stamp Set. This stamp set is a Reversibles** set, so stamps are two sided with an image on each side of the stamp for more creative options. Earn this stamp set FREE with a qualifying purchase January 3–March 31, 2020, during our Sale-A-Bration promotion! Ask your demonstrator about other coordinating products you can also get FREE. **Patent Pending.  I cut the lilies and the detailed die cut with the matching Lily Pad Dies which allows you to create custom die-cut water lilies, lily pads, and other fun paper cut outs for card making and scrapbooking.
My sentiment came from the I Say Hello Stamp Set from the 2019 Annual Catalog.  I thought it was just the perfect little sentiment for my bright and cheery card.  I did mat the designer series paper in Very Vanilla cardstock which mixed with the Whisper White are actually a fun little mix on the card.  I embossed the Granny Apple Green cardstock with the Beads and Baubles Embossing Folder.  I thought that the use of this embossing folder and the lilies was a perfect match.
Size & Dimensions: 

  • Gorgeous Grape Cardstock:  5 1/2 x 8 1/2
  • Granny Apple Green Cardstock:  4 x 5 1/4
  • Whisper White Cardstock:  4 x 5 1/4 (inside) scrap for the lilies, pad, and sentiment 
  • Very Vanilla Cardstock: 3 1/4 x 4
  • Lily Impressions Designer Series Paper:  3" x 4"
  • Noble Peacock Foil:  scrap
Thanks for dropping by I hope that you have enjoyed this little sneak peek of some of the new Saleabration items that are coming very soon.  Remember that Saleabration items can only be earned with qualifying orders.  I will see you again soon  
Happy Stampin' 
Rick Adkins 
Independent Stampin' Up! Demonstrator 

Product List:


Template Designed by creativeworkerbee